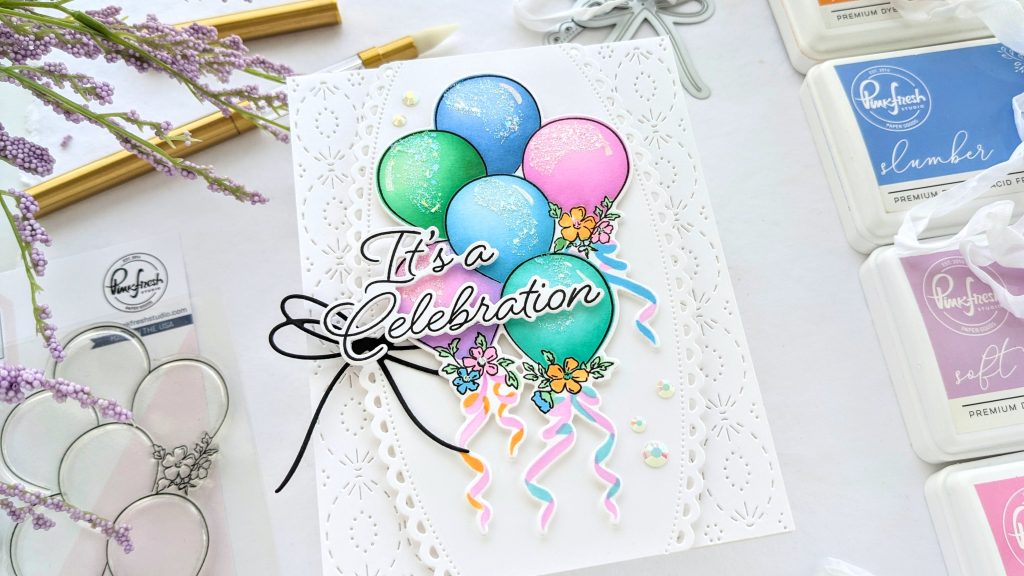
Hi everyone! I’m up on the Pinkfresh Studio blog today with a lacy celebration card made with Pinkfresh Studio’s new Ribbons & Balloons stamp, stencil, and die sets. A design like this is perfect for all sorts of occasions. I think this card, in particular, would be lovely for welcoming a new baby to the family.
Now it’s time to color! I started by putting a panel of white, heavyweight cardstock into my MISTI to lightly stamp the balloon image, and as usual, I left the stamp in the platform in case I wanted to stamp over my coloring. For stencil #1, I used Soft Lilac over both balloons and Lavender concentrated where the balloons narrow down and/or might be shaded by other balloons. Then I decided to go over one of the two balloons with Sparkling Rose, lightly, to make it more pinky-purple, which is very technical, I know. And for the other balloon, I lightly went over it with Summer Shower. Also, some of the ribbons are colored in with stencil #1.

I followed the same formula for the remaining balloons, stencils 2-5. I would go over the whole balloon with my lightest shades and use the next shade or two in that color family to darken areas giving the balloons a rounded look. Mint, Meadow, and Emerald City. Slumber and Storm. Ocean Breeze and Aquamarine. Sky Blue, Summer Shower, and Seaside. And I decided to throw Apricot in for some of the flowers and ribbon.
When I was done coloring, I decided to stamp over it with Detail Black. Then I die-cut the ribbons and balloons image out but left it in the panel afterward and put a piece of tape on the back of the panel to keep it in place. Because I decided I wanted sparkly balloons!
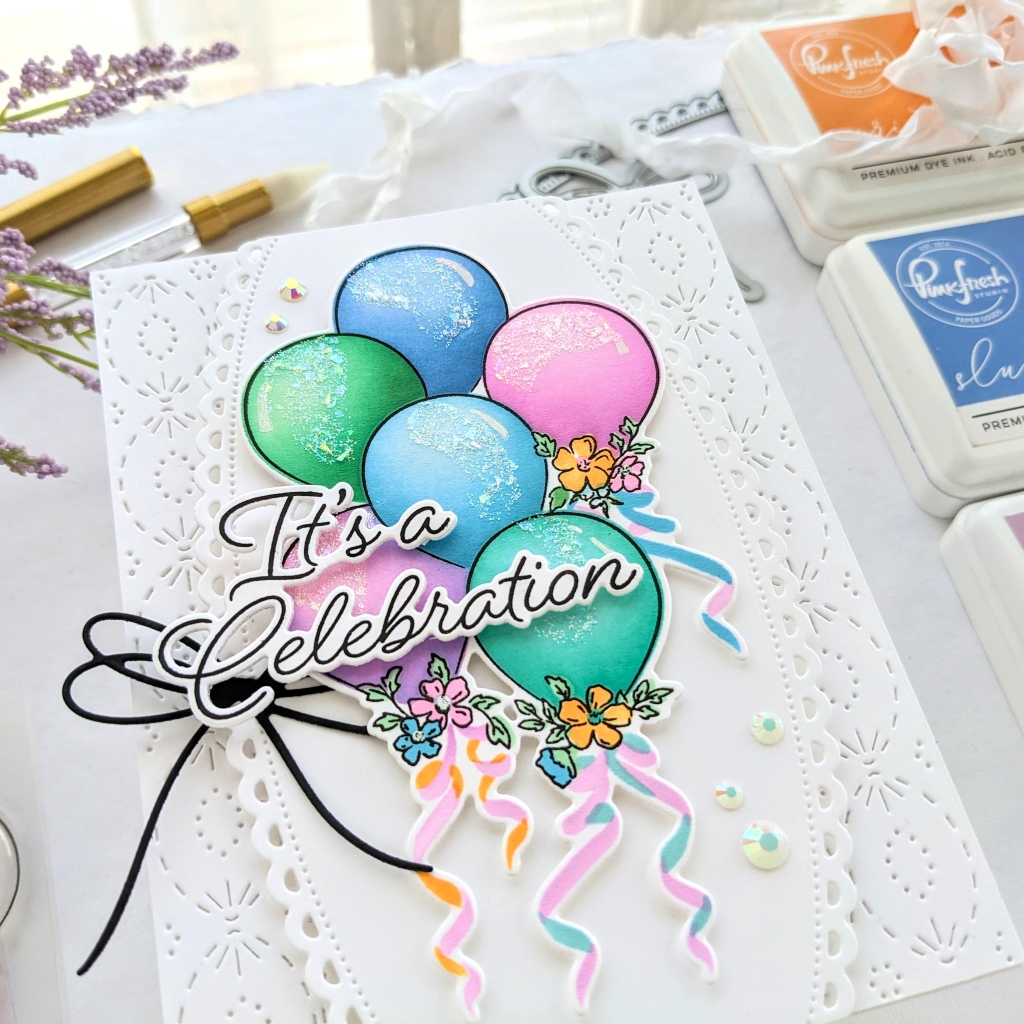
I pulled out my favorite glitter gel, Stickles Moon Dust, and used a fingertip to swipe some clear glitter onto the balloons. You can use the stencils if you like; you’d need to let each application dry before moving on to the next stencil and balloon.
While that was drying, I moved on to the cardbase. I used Pinkfresh’s Intricate Stitched Ovals coverplate die on a lightweight cardstock panel and taped it to an A2-sized cardbase. Then I used Classic Edgers on another panel of paper for some lacy borders on the side of my topping panel.
The balloon die-cut was popped up on top of that with more foam tape. (I almost always use glue with my foam tape, I usually need that extra second or two to slide that image or panel into just the right spot.)
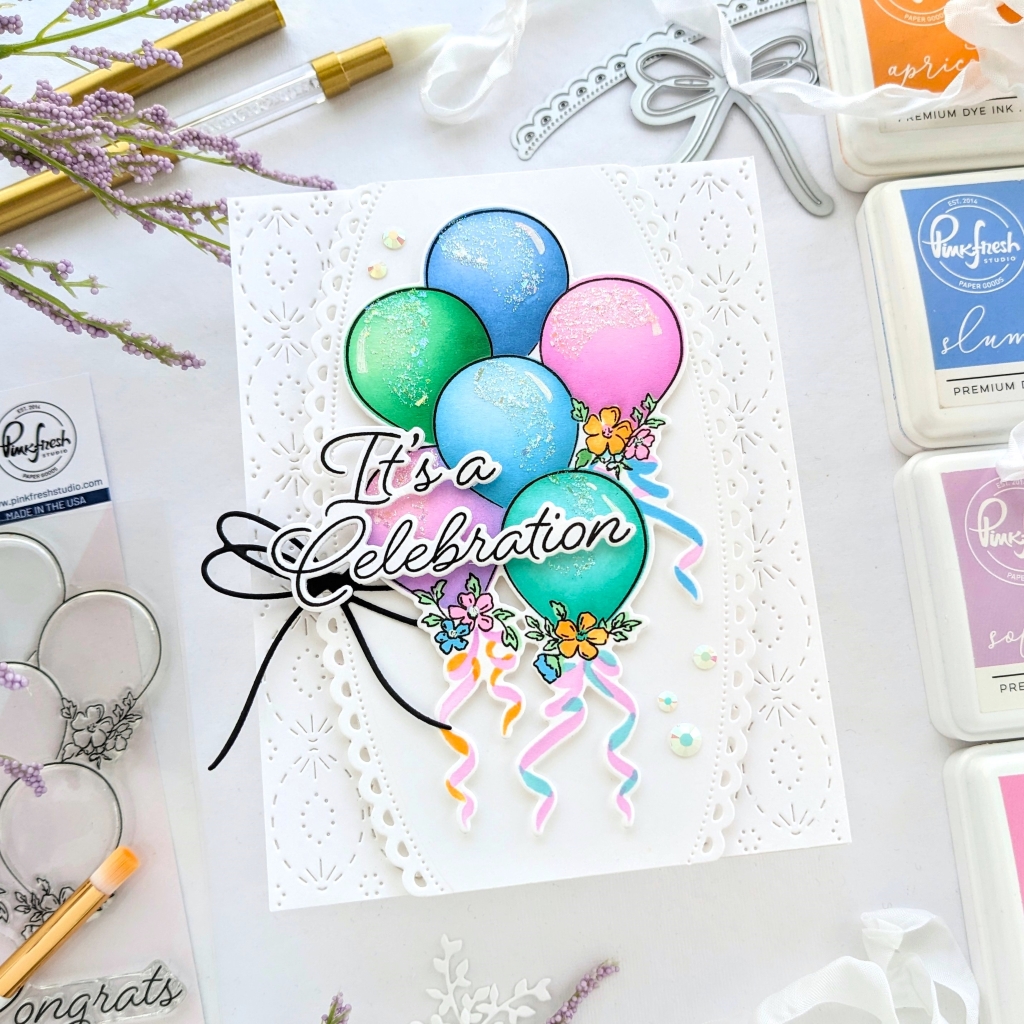
The sentiment is from the Ribbons & Balloons stamp and die sets. I needed to adhere two layers of the die-cut sentiment together to keep it strong. That fun black bow was made with a die from the new Wrap Around Elements die set. And I added some Glacier Jewels for a little more glimmer for my card. And I was done!
I hope some of these design choices have inspired you to make something new today, thanks so much for stopping by!
-Anne