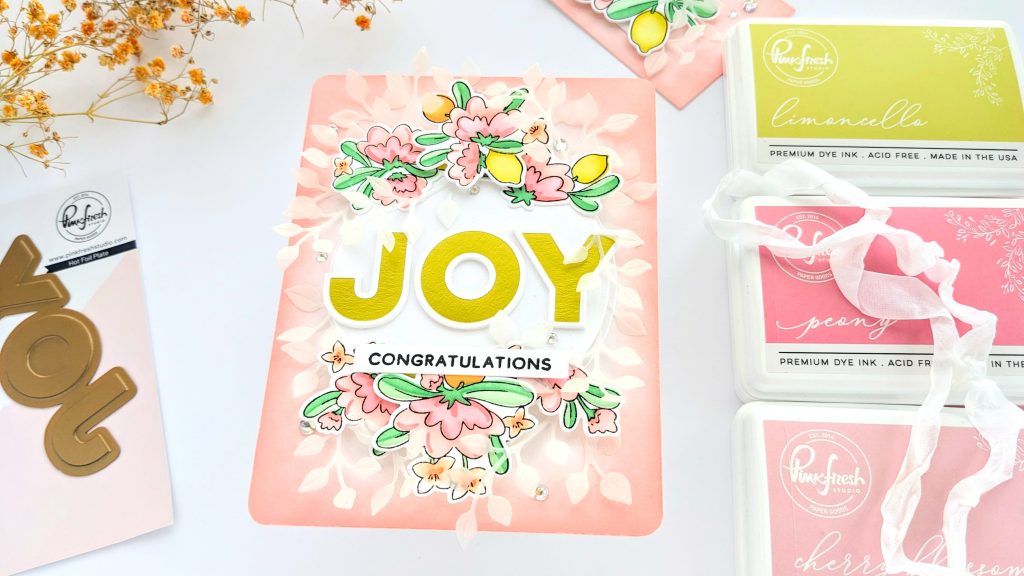
Hi everyone! I’m up on the Pinkfresh Studio blog today with a card and tag combo I made using a couple of the new Rose Garden inks. I pulled out the previously released Citrus Bloom stamp, stencil set, and die, along with the JOY hot foil plate and die, for a congratulations card. Perfect for welcoming a new addition to the household.
I couldn’t resist using the flowers of the Citrus Bloom design, with those scalloped petals, to play with a couple of the ink pads from Pinkfresh’s new pink family!
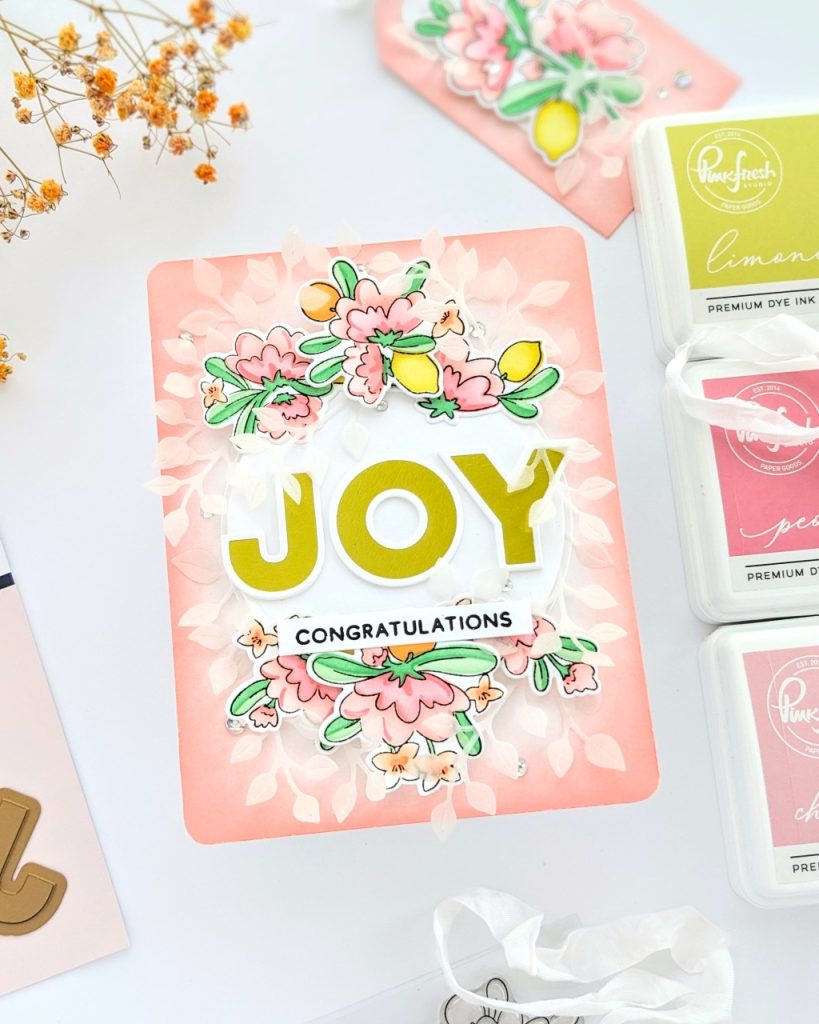
I stamped out the flowers onto white cardstock using light gray ink. Then, I used the stencil set to color them: Cherry Blossom and Peony for the flowers and Mint and Meadow for the leaves. There are mini blooms, too, and I used the new Sunkissed and Mimosa for a sweet and soft shade of orange. The fruit was colored using the new Limoncello and Citron for the lemons and Apricot and Clementine for the oranges. I stamped over it all with Detail Black and die-cut everything out.
Then, I used the lightest color in the group, Cherry Blossom, to blend some color onto an A2-sized cardstock panel just around the edge, blending it to leave the middle white. I die-cut a couple of circles and layered them in the middle of the card.
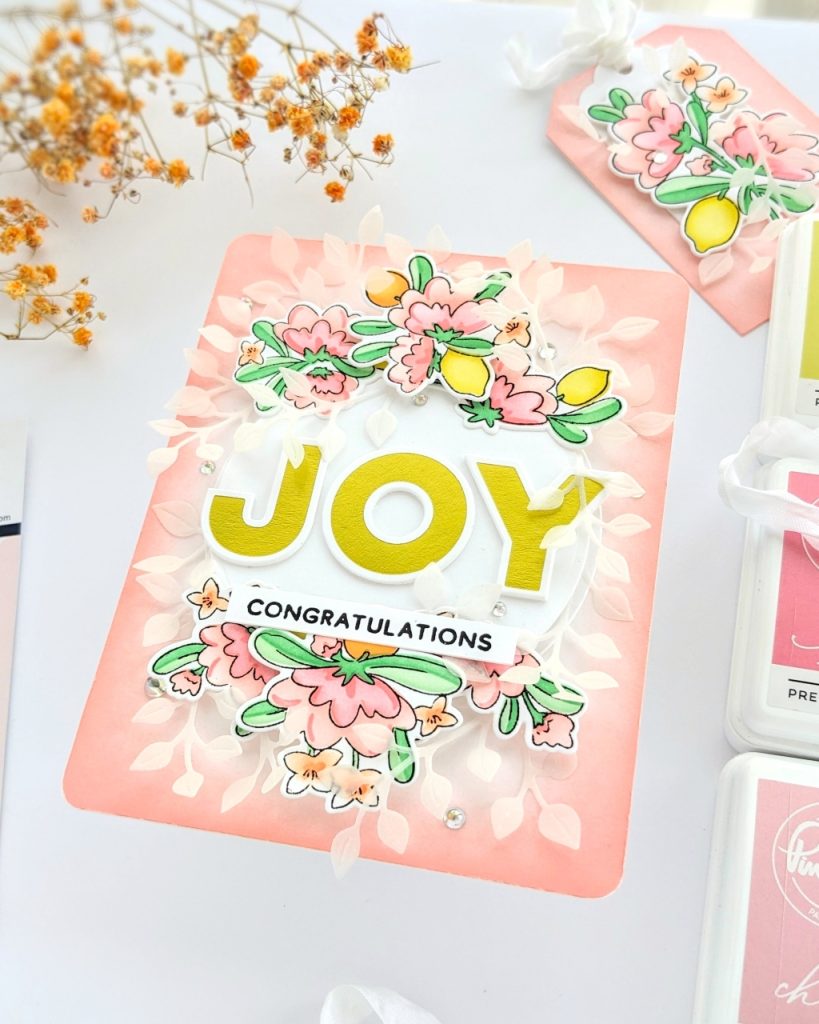
Then I used the JOY hot foil plate with Glimmers citrine foil (which matches the new Weeping Willow family of inks perfectly!). I had to heat the JOY plate twice to get it to foil well. I die-cut it out and glued the letters to the white circle on my card. Then, I started arranging the die-cut blooms, using foam tape on just a couple to provide space between them.
After looking at it for a while, I decided it needed some vellum Leafy Branches. I love how the vellum looks! They help to blend the white to pink on my card. This card would look equally sweet in orange, blue, or purple instead of pink.
I used the Basic Banners Celebrate stamp set for a secondary sentiment and added iridescent clear drops tucked away under some branches.
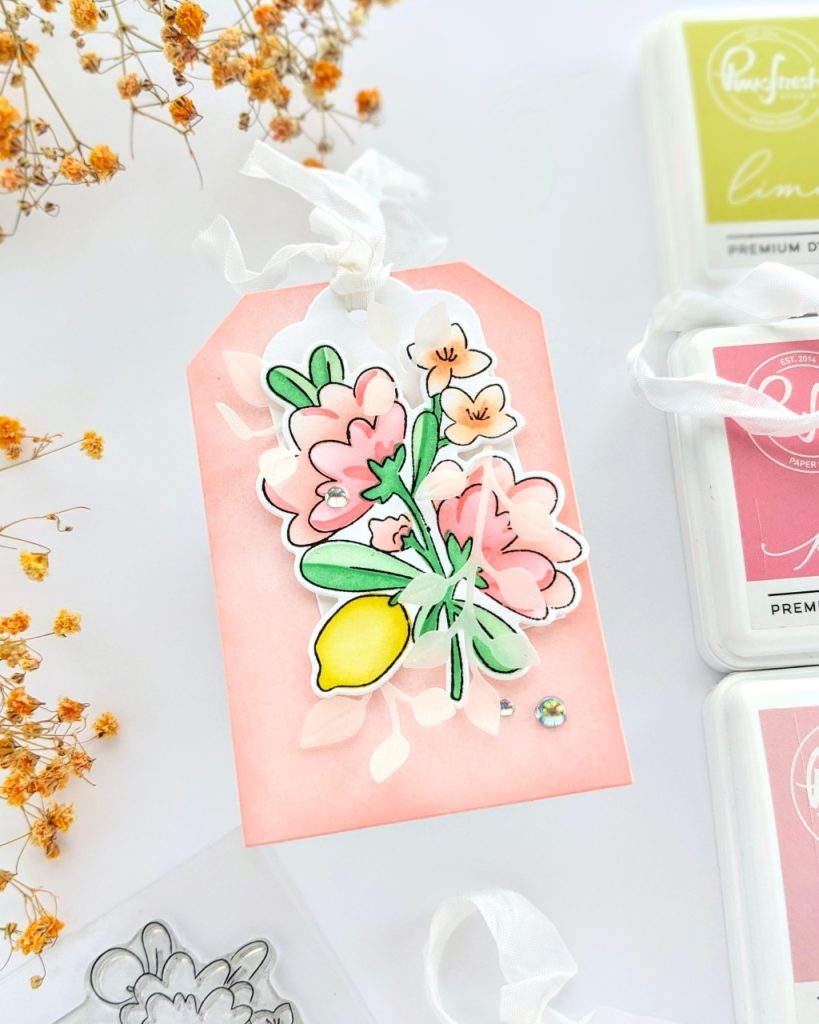
I made a tag too! A larger stemmed bloom is included in the single stamp design, and it didn’t work on my card, but I didn’t want to toss it or store it away. So I used the Shaker Tag Book dies for a couple of little tags, blended some ink onto the bigger one to match it to my card, and adhered the flower to the small one with some foam tape! So there I am, with my card and tag combo!
I hope some of these design choices have inspired you to make something new today. Thanks so much for coming by!
-Anne