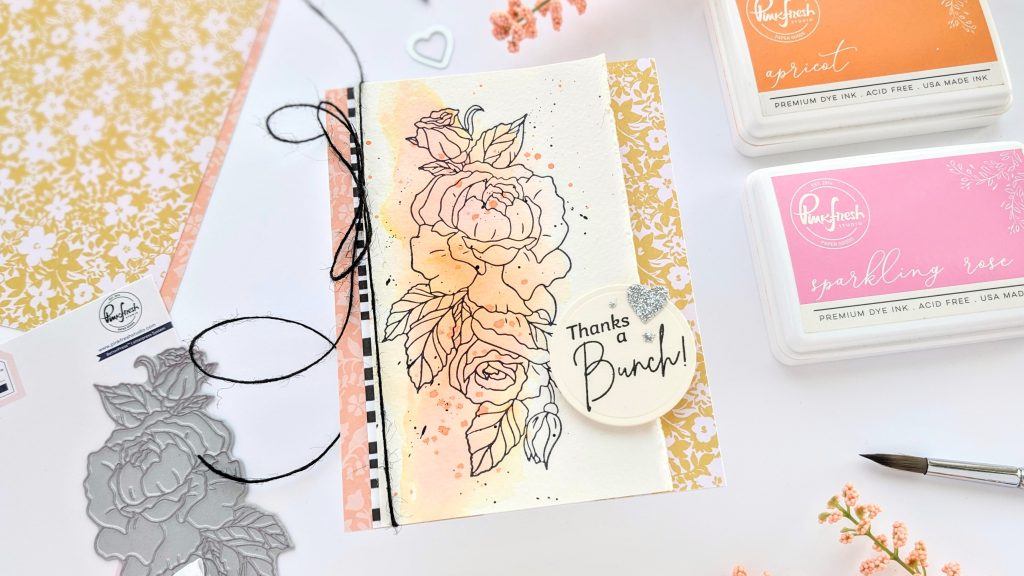
Hi and welcome! I have an easy, artsy, layered card on the Pinkfresh Studio blog to share today! I made this with the Beautiful Roses press plate and Pinkfresh’s Lovely Blooms 6 X 6 paper pack. I included a thank you sentiment because this is an excellent time of year to send out thank you cards. And I enjoyed including some black and white stenciling for a bit of graphic contrast on my soft, flowery card.
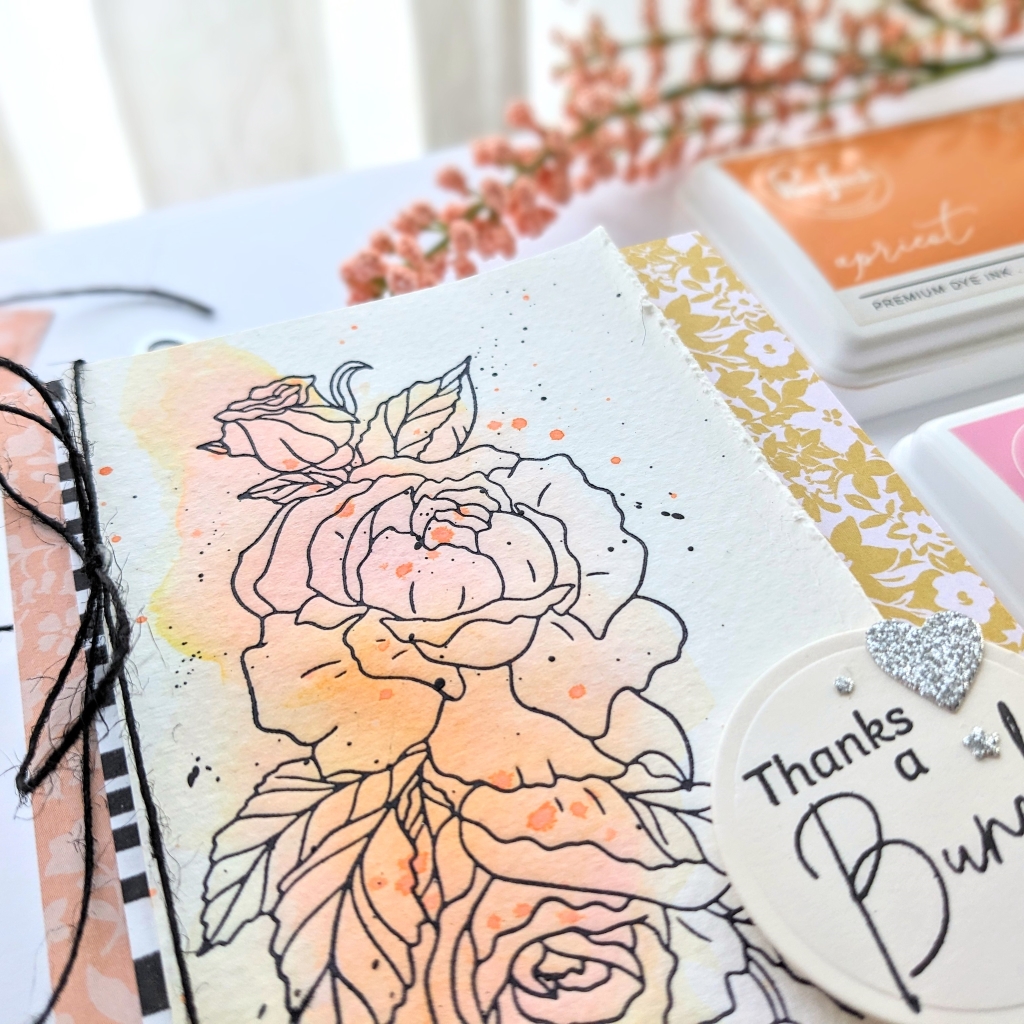
I started with watercolor paper (Pinkfresh’s, which should be available soon). I used BetterPress black ink and the new Beautiful Roses press plate. Then I used my PFS Apricot and Sparkling Rose ink pads, smooshed them onto a space on my glass table top, spritzed water on them, and grabbed a paintbrush.
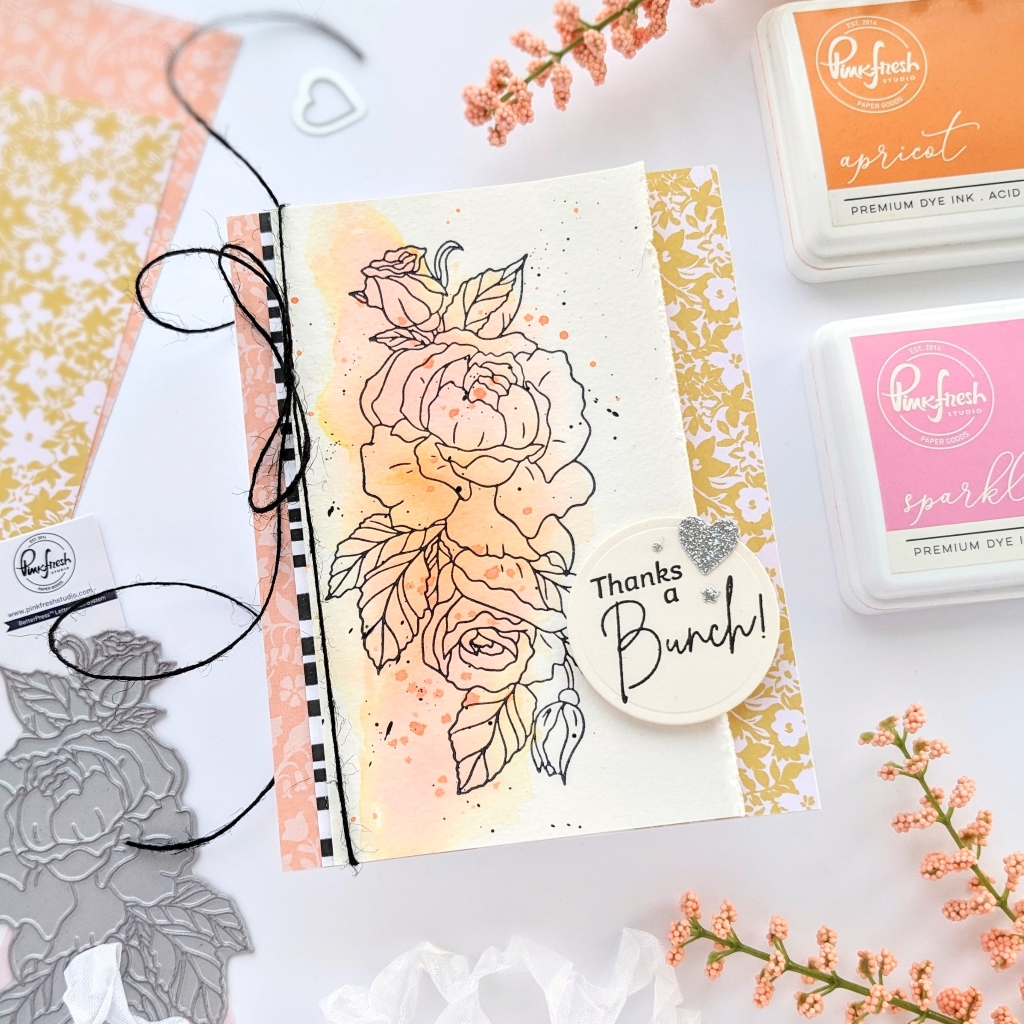
First, I put a wash of water on the panel with the pressed rose, then I applied some orange color (from my smooshed ink pad), and after that was mostly dry, I used a bit of pink ink in a couple of areas. And let it dry. That’s it. I am not an accomplished painter; anyone can do this. And I love how artsy it looks! That pressed rose and a wash of color? So pretty.
After everything was dry, I came back and splattered with a darker orange ink and some black gouache. I cut the panel down and roughed up one of the edges with my fingernail. Then I grabbed a small pair of scissors and ran the cutting edge back and forth to distress the card more, just for some interesting texture.
I grabbed the Lovely Blooms 6 X 6 paper pack and selected some patterned papers. I cut off a couple of inch-wide strips from them and taped them down to my card base. Then, I used one of the two stencils in Pinkfresh’s Slimline Skinny Plaid stencil set with Detail Black ink for some black and white stripes. I cut that down to size and applied it to my card base over the patterned paper.
I couldn’t resist tying a black string bow onto my painted panel before taping it to my card base. I almost added bling, but in the end, I decided not to; there was plenty going on with this card already. But if you are a card maker who likes bling on quite a lot of your projects, then you absolutely can go ahead and add some drops or jewels to this card. Never let “I should” or “shouldn’t” get in your craft space with you. Always go with what makes you happy.

I used a sentiment from the Beyond Happy stamp set and included a sparkly heart and star, made with Pinkfresh’s Hearts and Stars coverplate die, a heart die from the Shaker Tag Book die set, and PFS’s new silver Glitter Cardstock for more interest with texture. Then I was done!
I hope some of these design choices have inspired you to make something new today! Thanks so much for stopping by!
-Anne