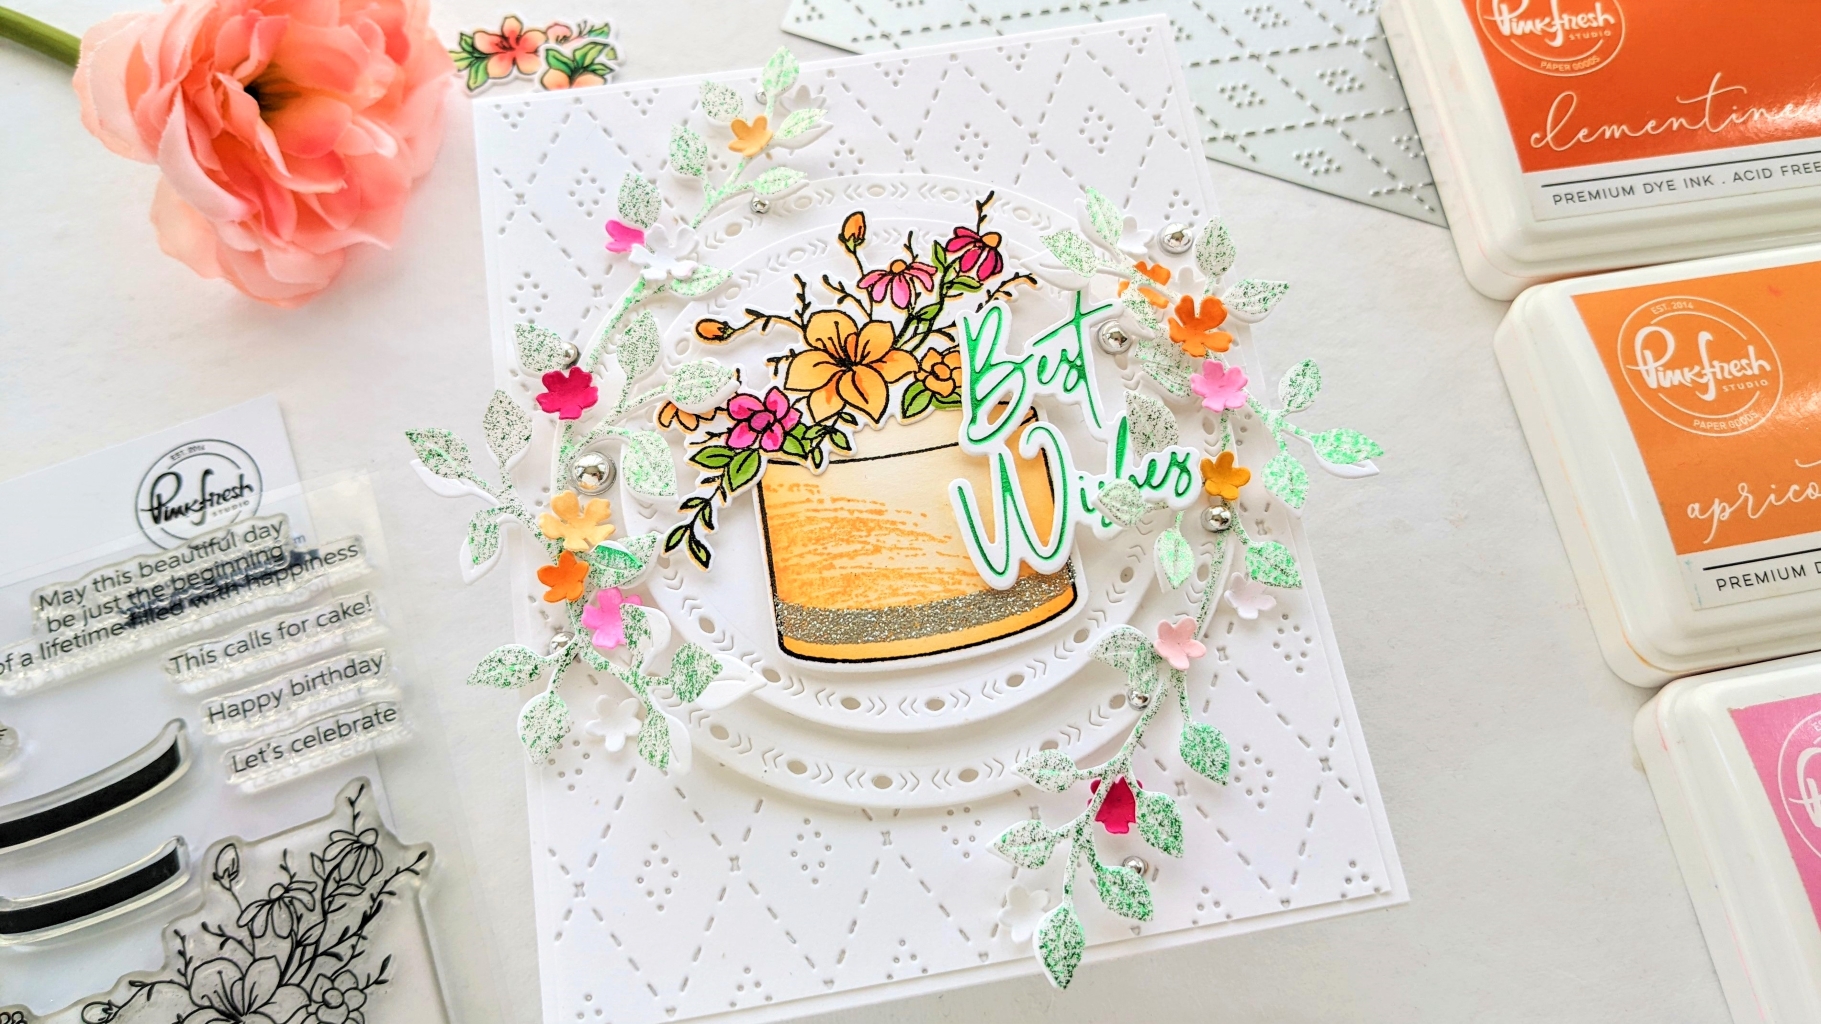

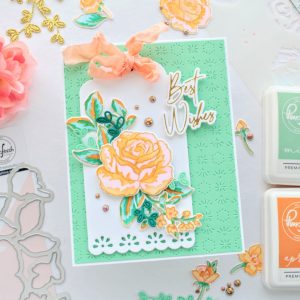
Hi everyone! I’m up on the Pinkfresh Studio blog today with a sweet, summery, “Best Wishes” card. I think this can be used for a few different kinds of occasions: engagements, anniversaries, birthdays… I really enjoyed how it turned out! I used Pinkfresh’s new Celebrate in Style stamp, stencil, and die, along with the new Stitched Diamonds cover plate die for this lovely card.
I started by stamping the flowers and cake image from the stamp set onto some white cardstock, using a very light-colored ink. After I got everything colored in using the 5-stencil set, all the pinks, and almost all the oranges that Pinkfresh has, I put the image back into the stamping platform and added detail with Detail Black ink. Then once that was dry, I used the stamp set once again to put a sparkly silver stripe on the cake, using embossing powder. Then I die cut everything out and set it aside.
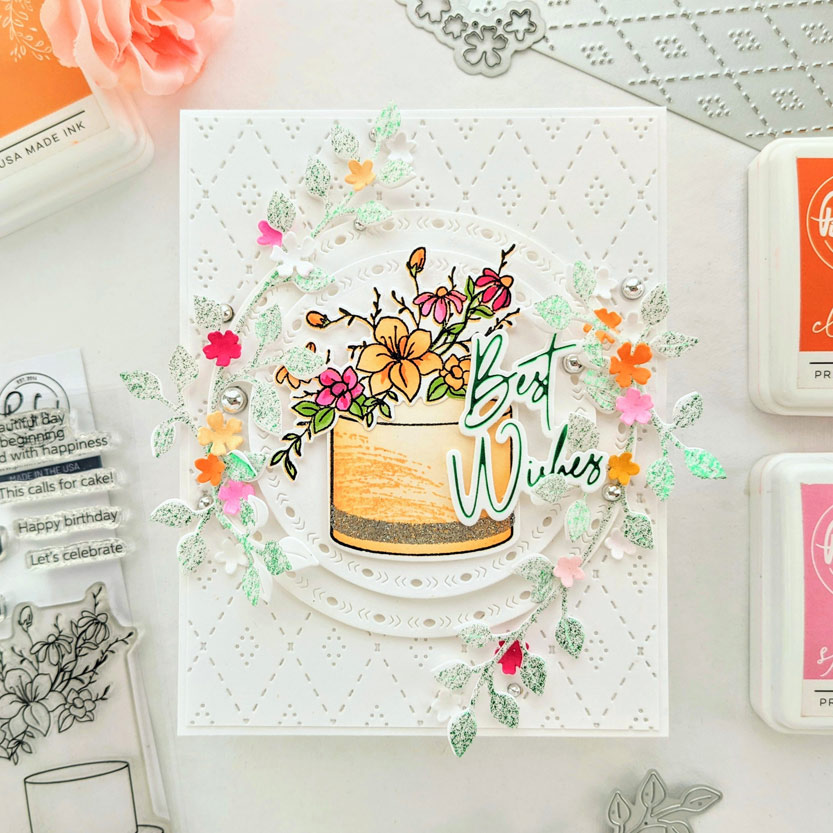
I had previously experimented with using Pinkfresh’s solid hot foil plate with vellum and green foil and had a panel of flecked green vellum in my stash, so I used the Leafy Branch die with it for a couple of delicate branches. (To get this flecked look I think I only heated the solid hot foil plate once instead of the recommended two times.) I love to experiment in the craft room, some of those “mistakes” can turn out to be something really fun. Take another look before you toss it!
I also had a green, hot-foiled sentiment in my stash that turned out to perfectly compliment my design, it was made using the Modern Scripted Sentiments hot foil plate and die.
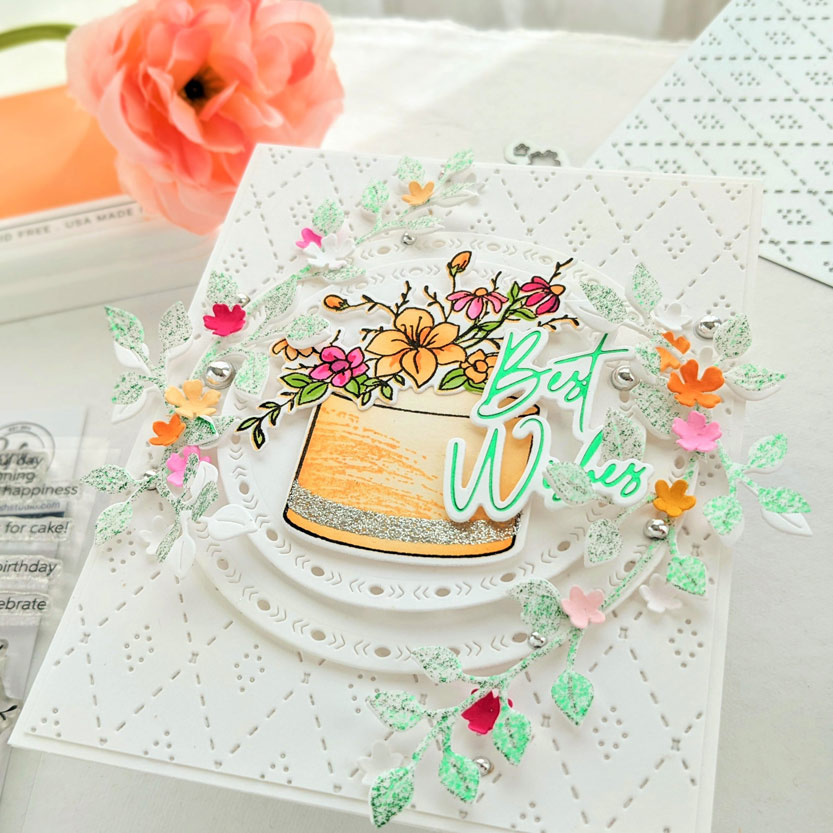
Then it was time to start putting everything together. I trimmed my Stitched Diamonds panel down just a bit to add to the layered look and glued it to my white cardbase. I die-cut a couple of circles using Folk Edge Circles die set, from more white cardstock and used fun foam to layer them together, then centered them on the card. The cake and flowers went down next with foam tape. Then I layered the two green foil-flecked branches on top of white cardstock branches (just the long center stem was glued together) and adhered them to the card around the centered circles.
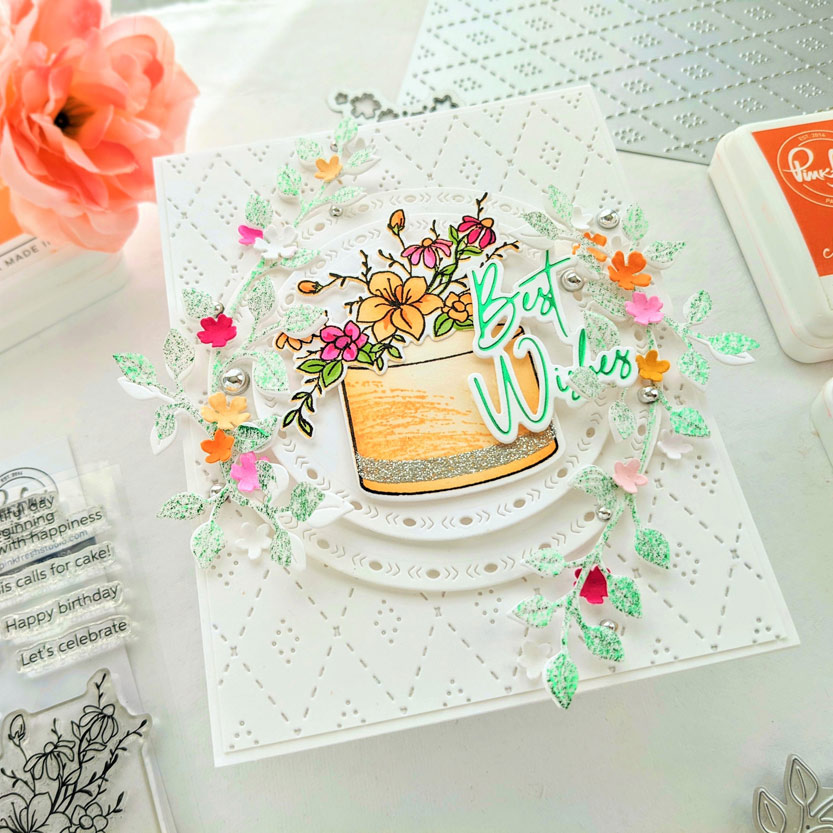
To add some flowers along the leafy branch, I used Pinkfresh inks and the Garden Wreath die set (tip: I kept the die-cut flowers in the panel of paper I had cut them from when blending color onto them). I added the sentiment and some Metallic Silver Pearls and was done!
I hope some of these design choices have inspired you to make something new today! Thanks so much for stopping by!
-Anne

This card is beautiful!! I love it.
Oh, thanks so much Anita!!