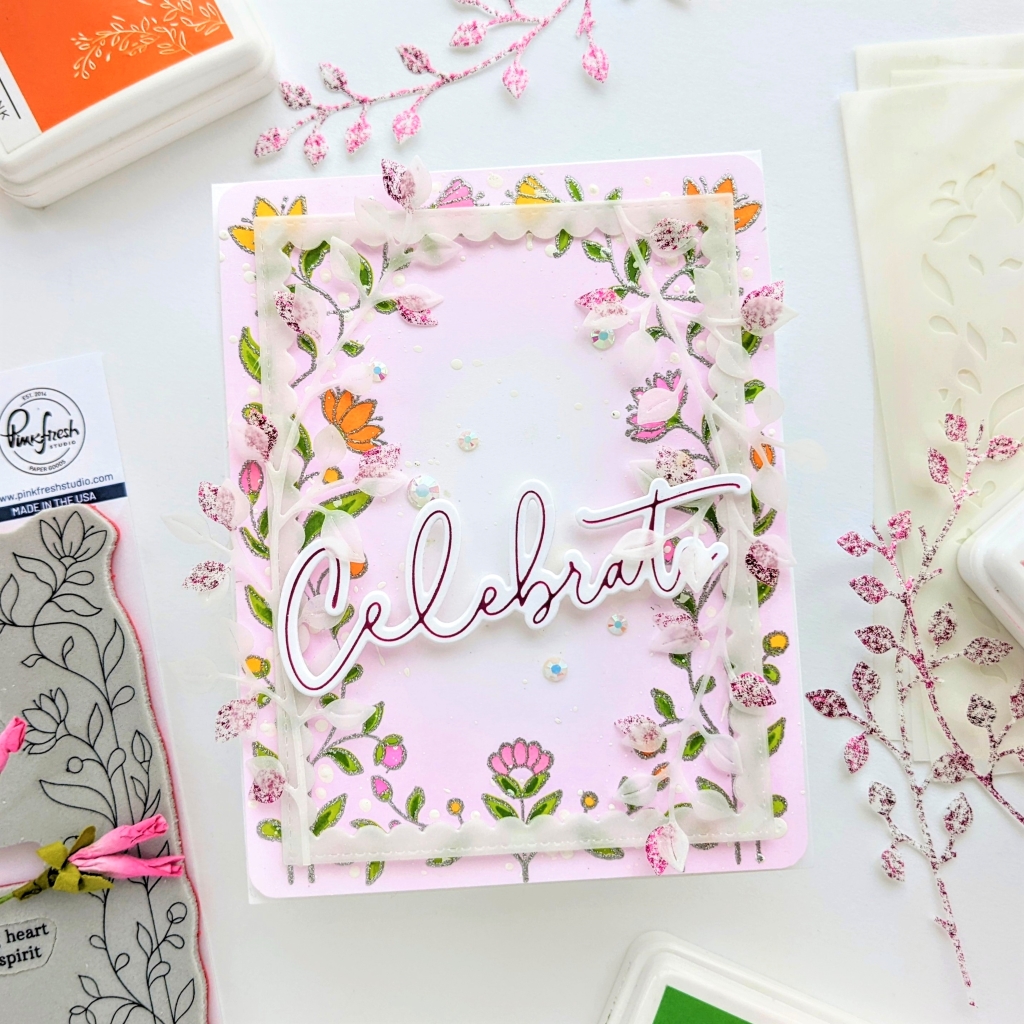
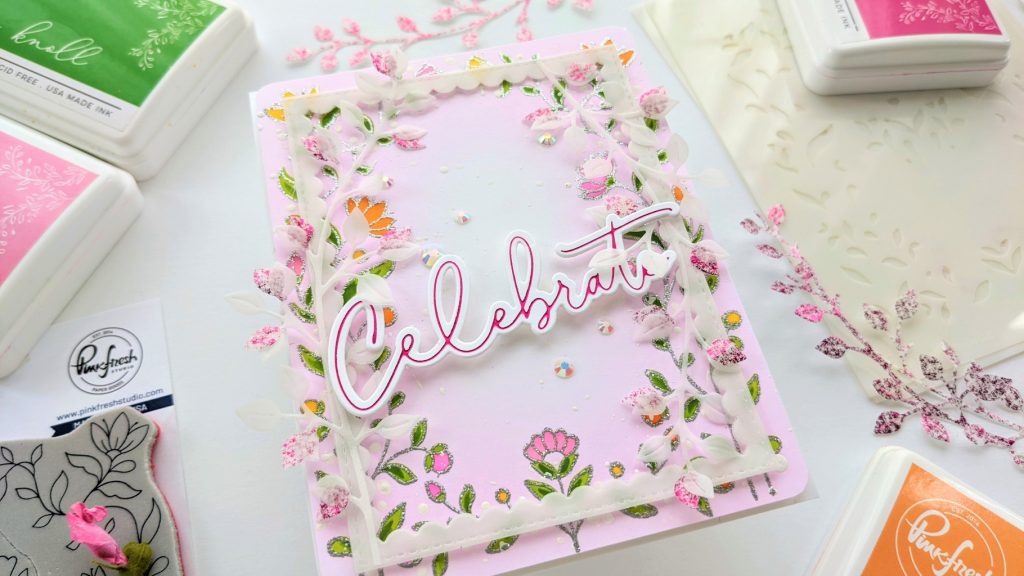
Hi everyone! I’m up on the Pinkfresh Studio blog today with a fairy tale card inspired Lea Lawson’s live on YouTube last week. During her live demonstration she spoke of how the Spark of Goodness Floral Frame reminded her of a fairy tale image and I loved that idea! It really inspired me. I used the Spark of Goodness Floral Frame stamp, layering stencil set to put my own spin on a fairy tale card.
I started by pulling out the center filigree flower and two sentiments that come as part of the cling stamp because I wasn’t going to use them for this project. Then I stamped out the delicate and pretty leafy image with a light gray ink onto some white cardstock and I used the largest blending brush that I have to blend Sparkling Rose just over branches, trying to leave some white space in the middle. When that was done I pulled out the layering stencil set to color the small blooms in Bubble Gum, Clementine and Sweet Mustard. The leaves were colored in with Grassy Knoll and Olive. There are 4 layers in the set but I ended up using only 3.

Then my colored in image went back into the stamping platform (where I left the stamp) so that I could heat emboss over it with some sparkly silver embossing powder. Then I decided to splatter with some white paint which ends up being just a subtle effect on that pale pink background. When it was dry, I adhered some fun foam to the back and taped it down to a white A2 cardbase.
I used Pinkfresh’s Stitched Scallop Rectangles die, and glue, to double up some vellum frames and used small pieces of foam tape to pop them up off of the base piece. Then I thought it would look really pretty to add a couple of vellum leafy branches to the frame. I think it would also look pretty without the scallop frame. Just adding additional vellum leaves would give a similar effect.
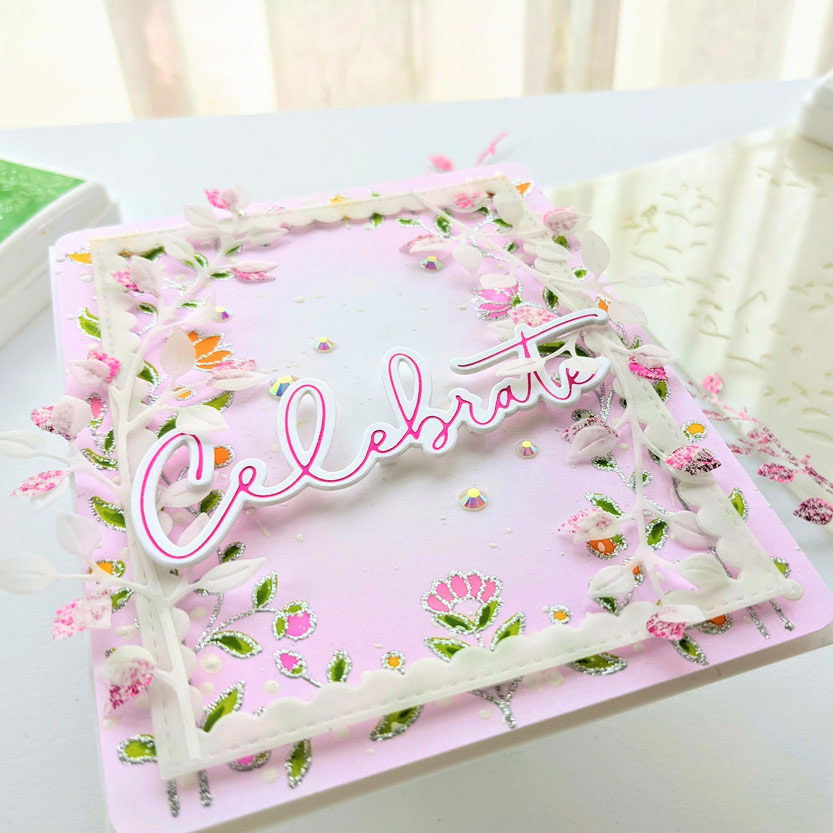
I had a sheet of “failed” foiling in my stash, (I had used Pinkfresh’s Solid Hot Foil Plate with Spellbinders Glimmer Magenta foil on some Bazzill 40lb. white vellum and it turned out kind of spotty, but I actually thought it looked really cool, so I saved it.) I pulled this foiled vellum sheet out and used the Leafy Branch die for more die cut branches. Then I clipped off a leaf here and there to glue to my fairy tale card.
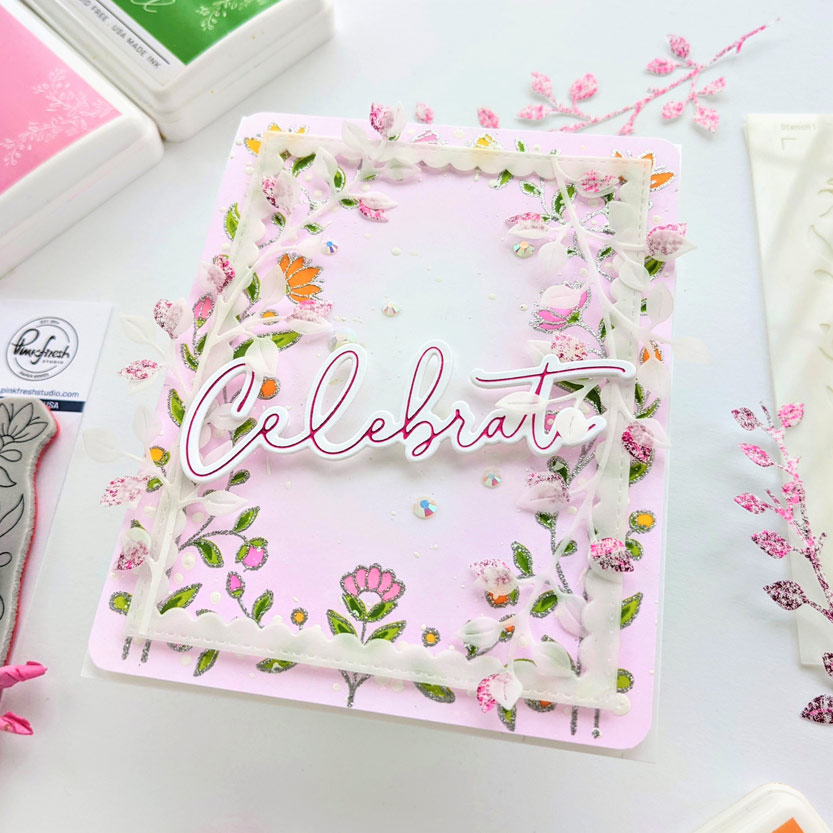
I also had a magenta foiled sentiment, made with the Celebrate hot foil plate and die, in my stash and was able to pop that up with more foam tape across the middle of my card. I added a few white jewels and was done.
I hope that some of these design choices have inspired you to make your own fairy tale card today. Thanks so much for coming by!
-Anne