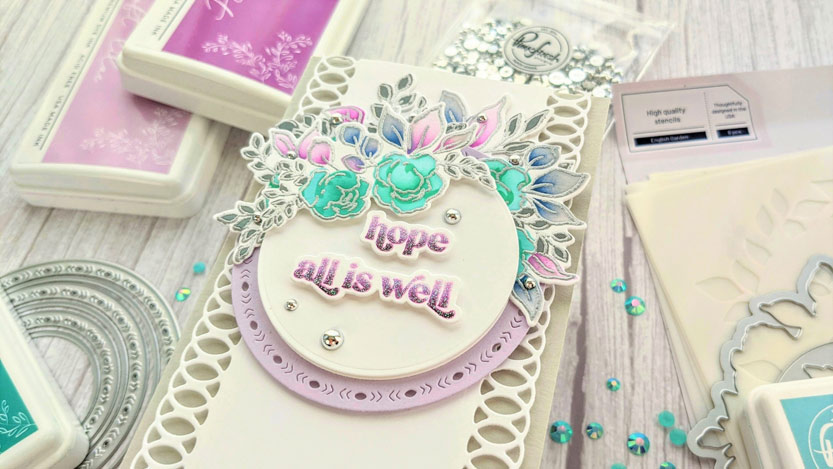
Hi guys! I’m up on the Pinkfresh blog today with a layered mini slimline made with a new Pinkfresh product that coordinates with a previously released design, the English Garden Layering Stencil set. I also used the coordinating English Garden stamp set and die.
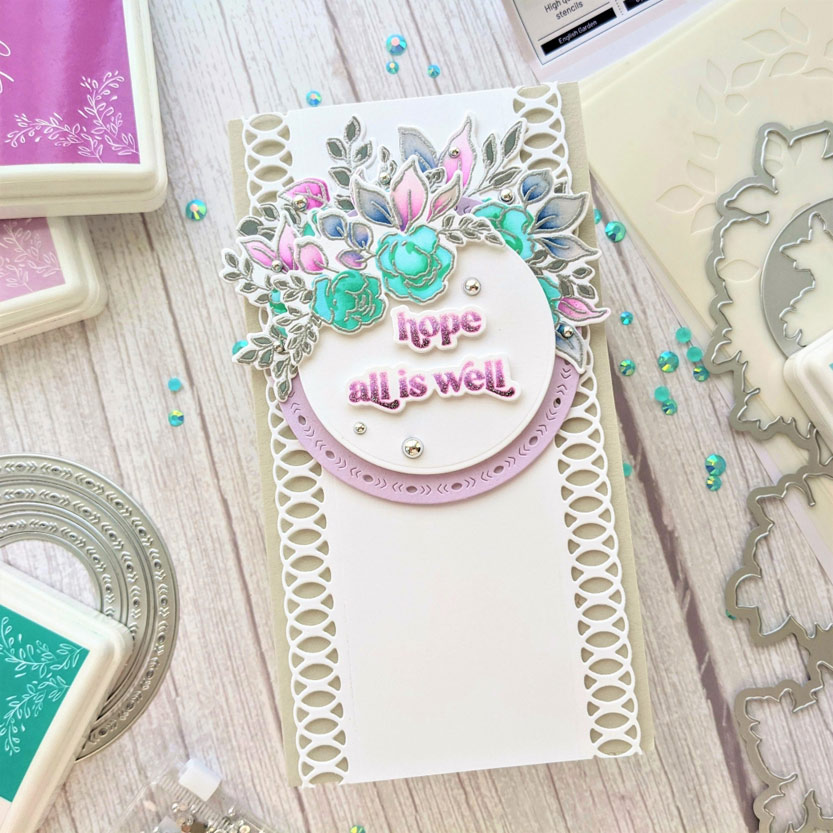
I started with the new layering stencil set and some Pinkfresh inks on white cardstock. For some of the leaves (Stencil #1) I used, Misty Coast and Storm, and for the rest I used Soft Lilac, Lavender and Candy Violet. For the remaining branches (Stencil #2), I used Metropolis. The flowers were colored in with Ocean Breeze and Aquamarine. Then my stenciled image went into my MISTI stamping platform and I heat embossed silver over it. So pretty!

After I die cut it all out with the coordinating die I decided to arrange the flower bunches in a sort of wreath of my own, so I cut out some circles using the Folk Edge Circles dies and set all of those pieces aside. The base of the card is Simon’s fog cardstock cut to measure 3 1/2 X 6 1/2 inches when folded. The topping white cardstock was cut to 3 1/4 X 6 1/2. Then I used Pinkfresh’s Slim Lacy Edgers along both sides of the card, a straight lined edge looked a little too abrupt to me and I liked the repeating circles.

I laid the die cut circles down on my card base (topped by the white piece) and started arranging flowers here and there till I got an arrangement I liked. I deconstructed everything and started adhering all of the pieces back together using glue and foam tape for dimension. The sentiment is from another new release: Just a Hello Floral stamp and die sets. I added some silver pearls and was done.
I hope that this has inspired you to make something new today. Thanks so much for coming by!
-Anne

Gosh, your cards are always gorgeous!
Oh, that made me smile. Thank you so much Marisela!!
What did you use to stamp the sentiment??? Very pretty!!!!
Hi Marilyn! For that ombre sentiment I used finger daubers (picked mine up from Scrapbook.com) and used them to apply 3 different shades of purple directly to the stamp. I used Soft Lilac and Lavender on most of it, with just a little Candy Violet at the bottom of the stamp (and Regal Kiss only on the letters that have long descenders). Then I heat embossed over it with WOW!’s “Halo”, which is a clear, sparkly embossing powder. I hope that helps, thanks for reaching out. Let me know if you have any more questions, I could seriously talk cardmaking, ALL. DAY. Thanks Marilyn!
I knew there was a good reason that the letters looked SO special!! Thanks again!!