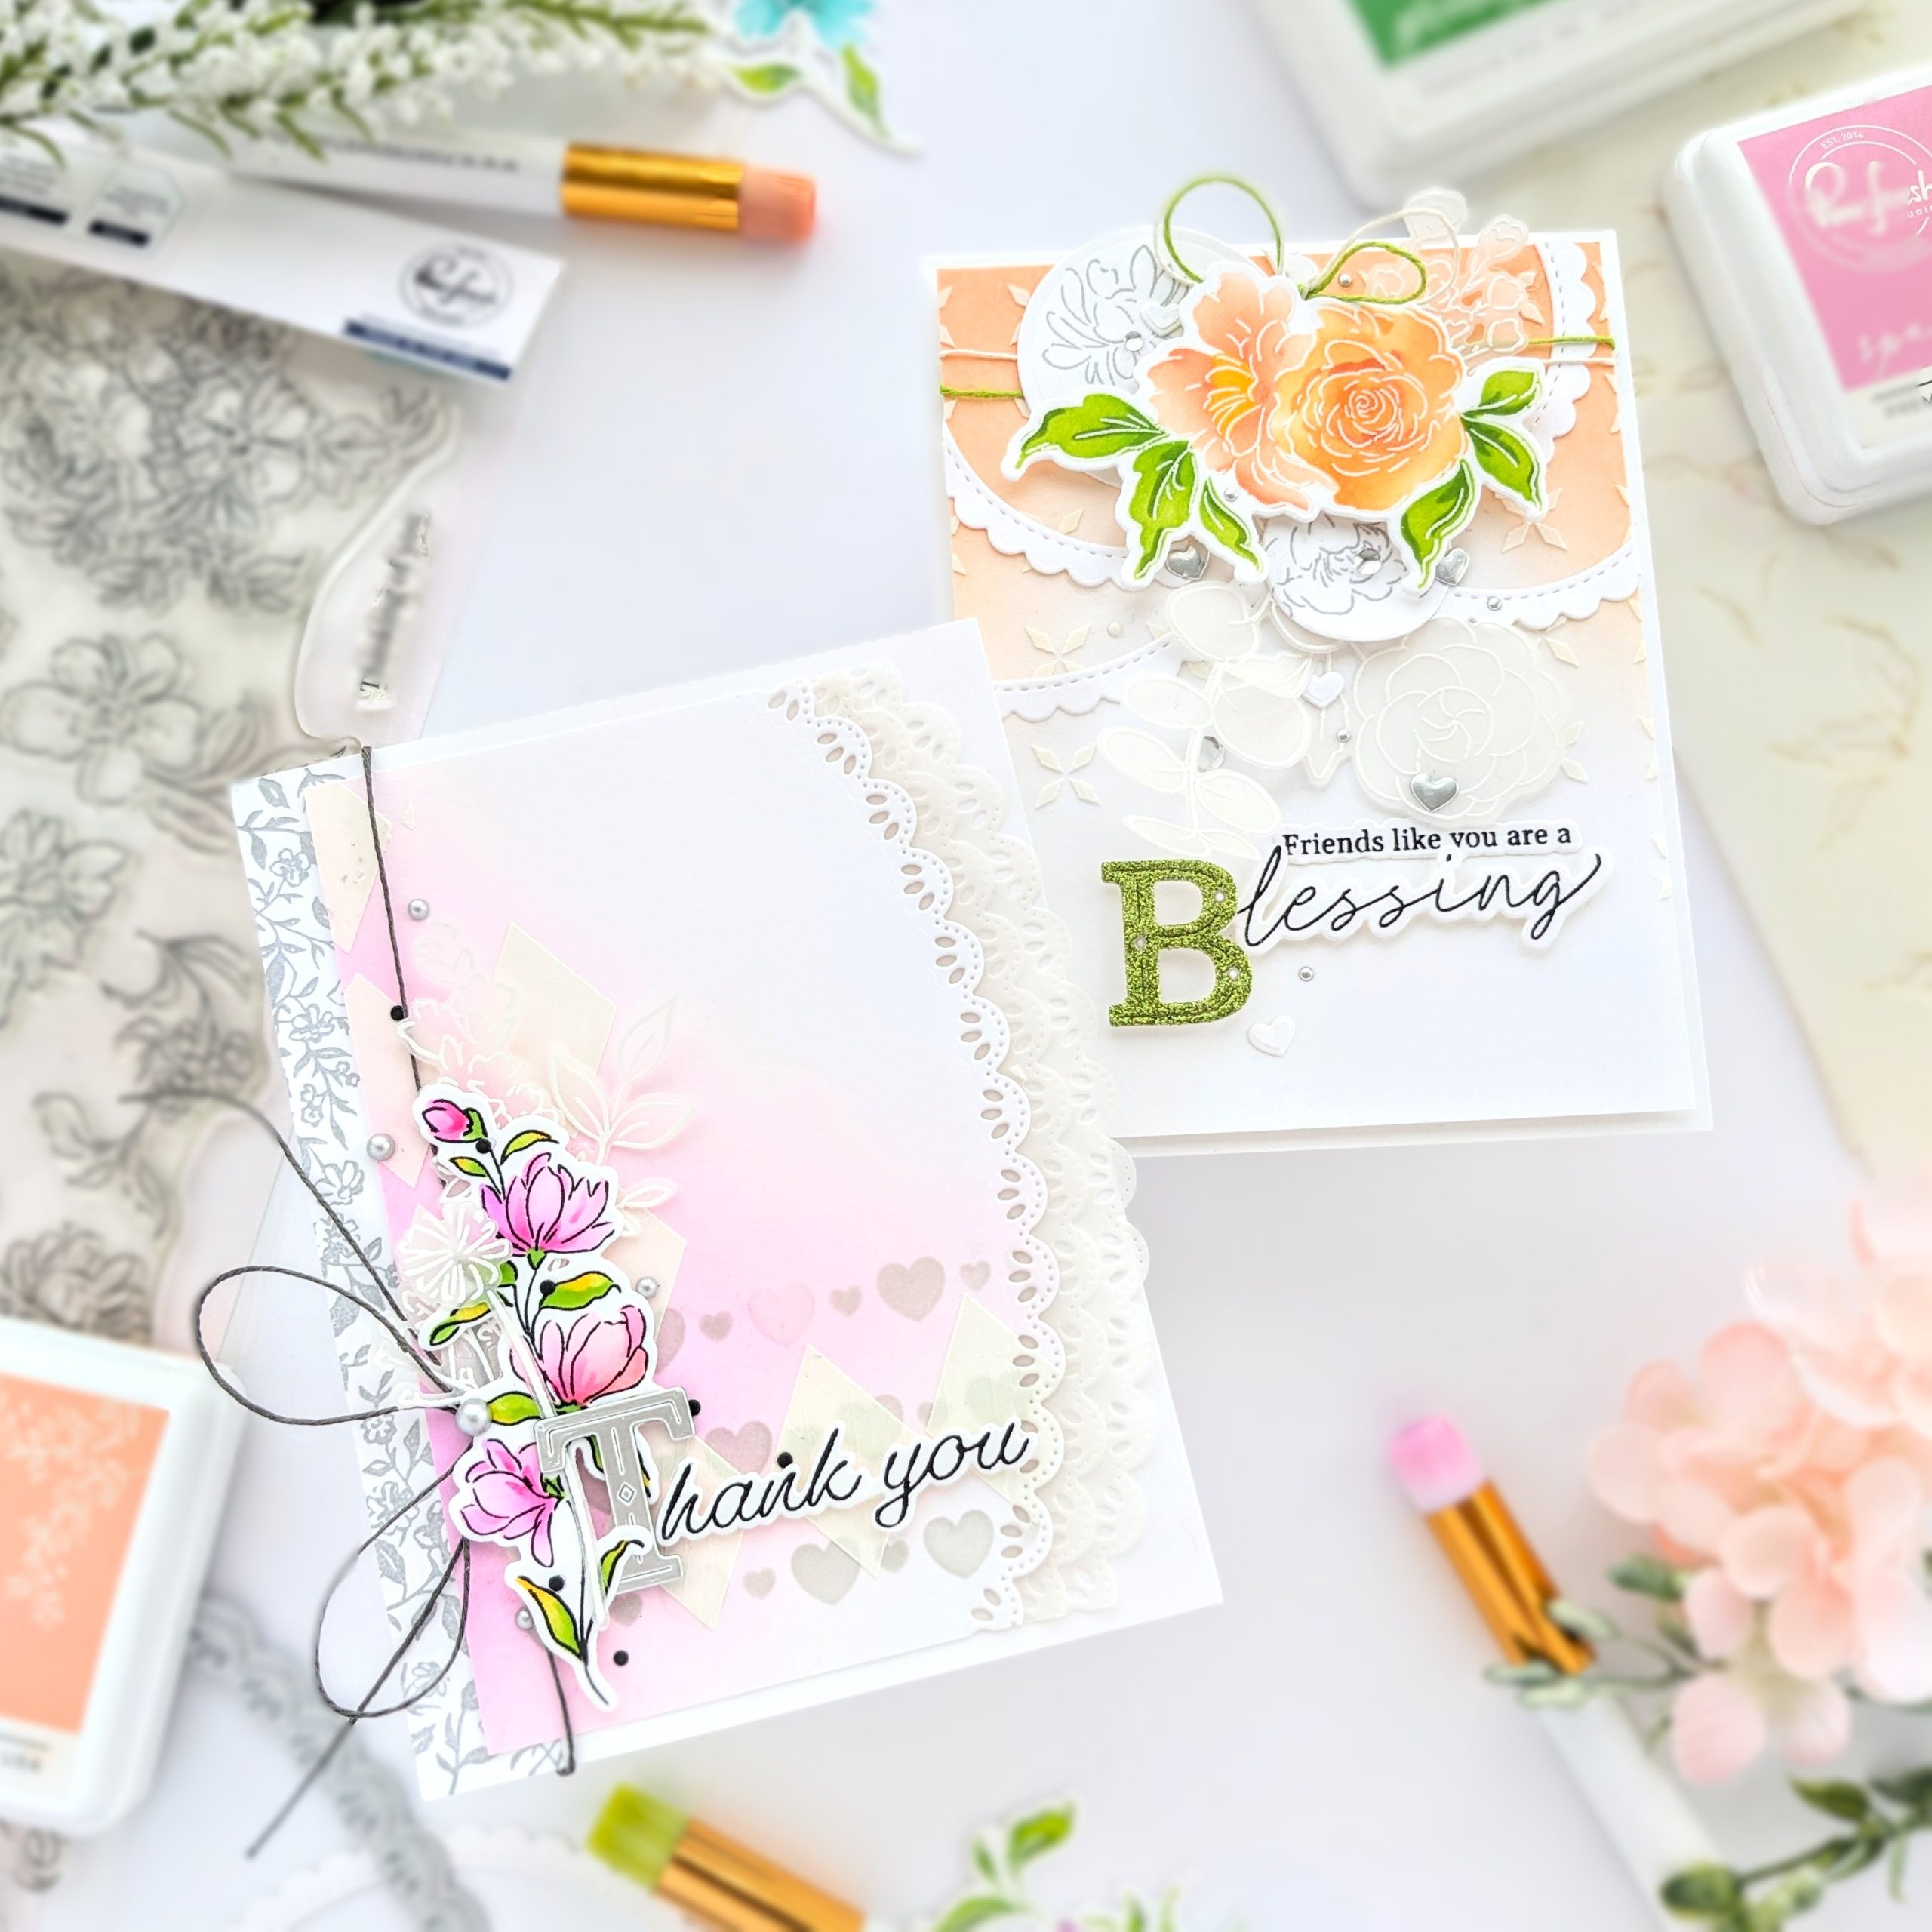
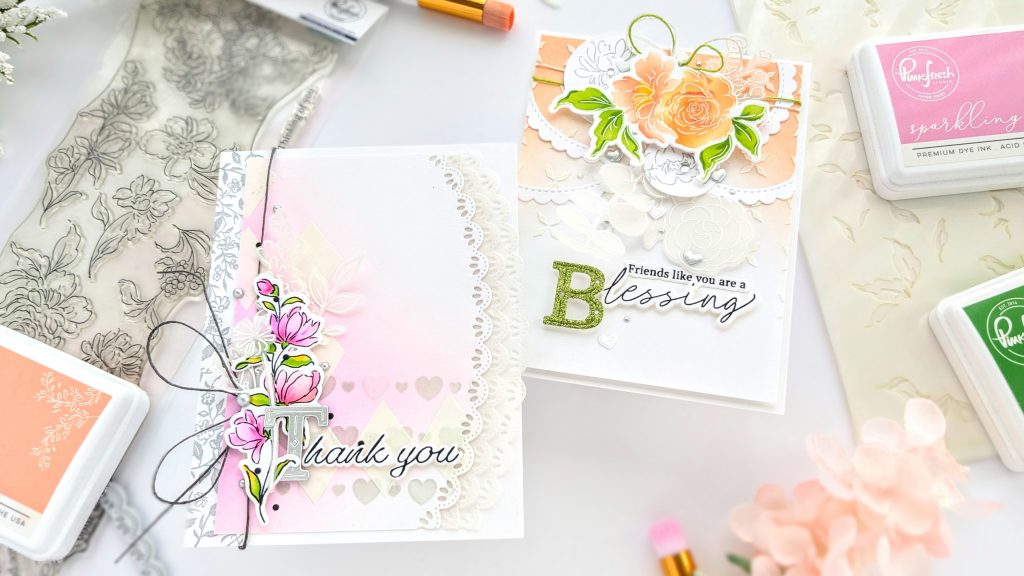
Hi everyone! Today, I’m on the blog with a couple of cards I made after being inspired by Pinkfresh Studio’s new Artsy Floral designs. I kept the colors relatively simple and layered stenciling on top. Then, I stacked a few layers of stamped, embossed, and colored cardstock die-cuts for a couple of sweet cards.
The Artsy Floral design includes a stamp, stencil, die, and washi tape. I did not use the washi for these cards because… I wanted to color. I stamped the florals using black detail ink and white heat embossed another panel. After coloring the flowers, I die-cut them out. I picked two bouquets to work with and stashed away the rest for future projects.
I used Sunkissed and Mimosa on an A2-sized cardstock panel for my orange card. Then, I used a stencil included in the Kaleidoscope stencil set with opaque texture paste.
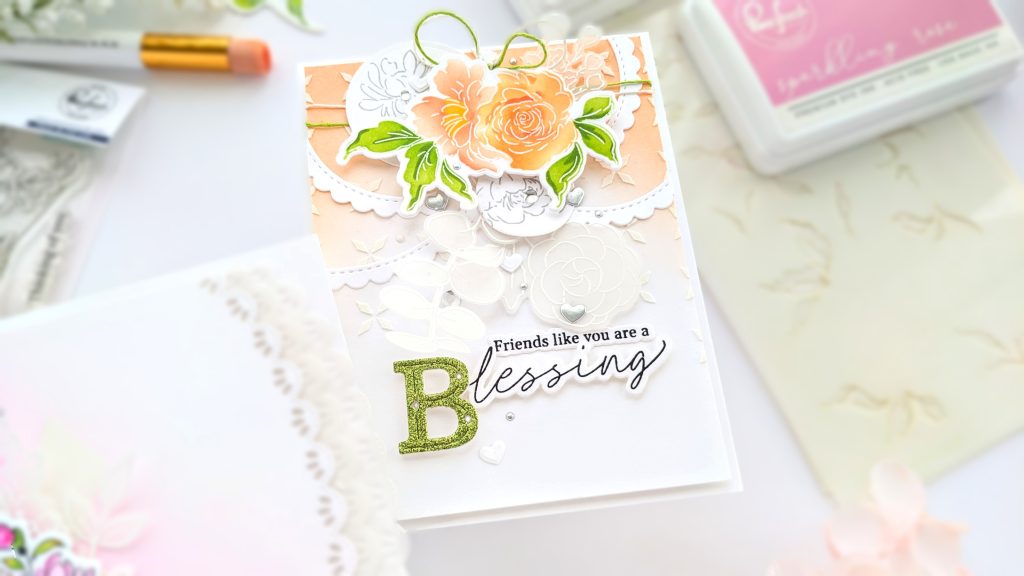
When that was dry, I cut the panel down to 4 X 5 1/4 in. Then, I tied a couple of twine strings around it and started making ephemera for the orange card. I spent a little time arranging everything before adhering it all down.
I used a couple of Stitched Scallop Circle die cuts. I then stamped the Floral Artsy stamp again using gray ink and die-cut a couple of circles from that. I white heat embossed another Pinkfresh stamp set, With Love, on vellum and layered them straight down to the card. On top of that, I used foam tape to pop up the Artsy Floral bouquet.
For my pink card, I used three shades of ink. Then I used the Slimline Heart Builder stencil to ink some hearts over the blend and pulled out another stencil, Argyle, to use with more texture paste. After the panel was dry, I cut it to 3 1/2 X 5 1/4 inches and used PF’s Classic Edgers die set along one side of the panel. Then, I added two lacy vellum strips to the die-cut border.
I found an A2-sized panel in my stash where I had used the Fairytale Frame press plate with silver ink. I cut a strip from it, combined it with more cardstock, and then adhered it to my cardbase. I tied another twine bow around the pink panel and taped it to the cardbase.
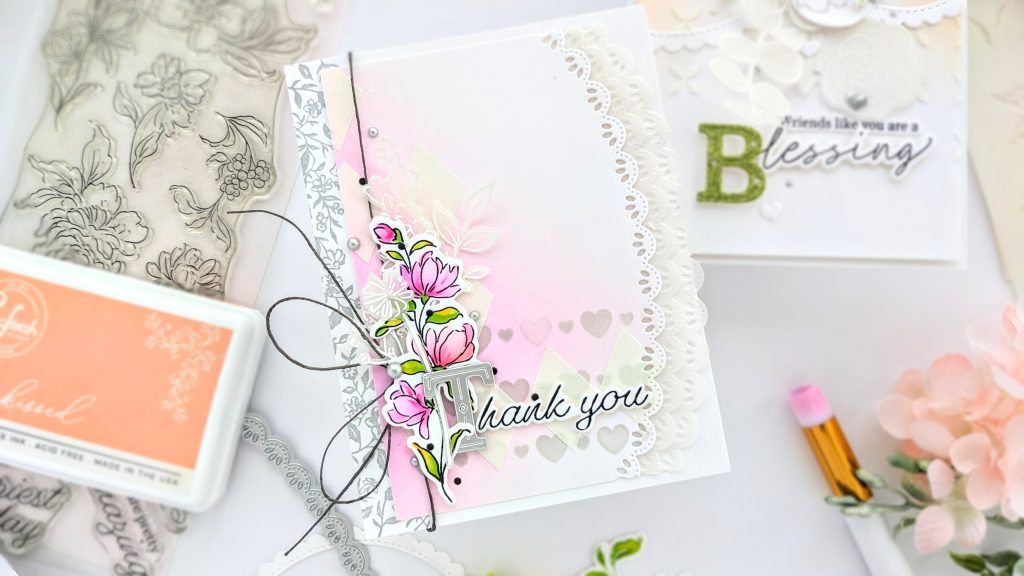
Using vellum, I white heat embossed the Wildflower Bouquet stamp set. Then, I layered those die-cut pieces around my pink flowers and adhered them to the topping panel with foam tape.
I used sentiments from the Artsy Floral and Sakura stamp sets and decided to use the Julieta Alpha with them.
Not only did the Artsy Floral design inspire me to make these artsy cards, but I was also significantly influenced by a card I found on Pinterest by the fantastic Ivana Camdzic.
For these cards, leaving plenty of white space was key, as well as keeping the colors uncomplicated and having all of the ephemera ready (be sure to look through your stash drawer!) and arranged into place before gluing anything down.
I hope some of these design choices have inspired you to make something new today! Thanks so much for coming by!
-Anne

Such beautiful creations. Your blog does inspire me to create in a new way. Thank you for taking the time to share your creations.
Oh, that’s wonderful! 🩷 Thank you so much, for coming by, Charlene!