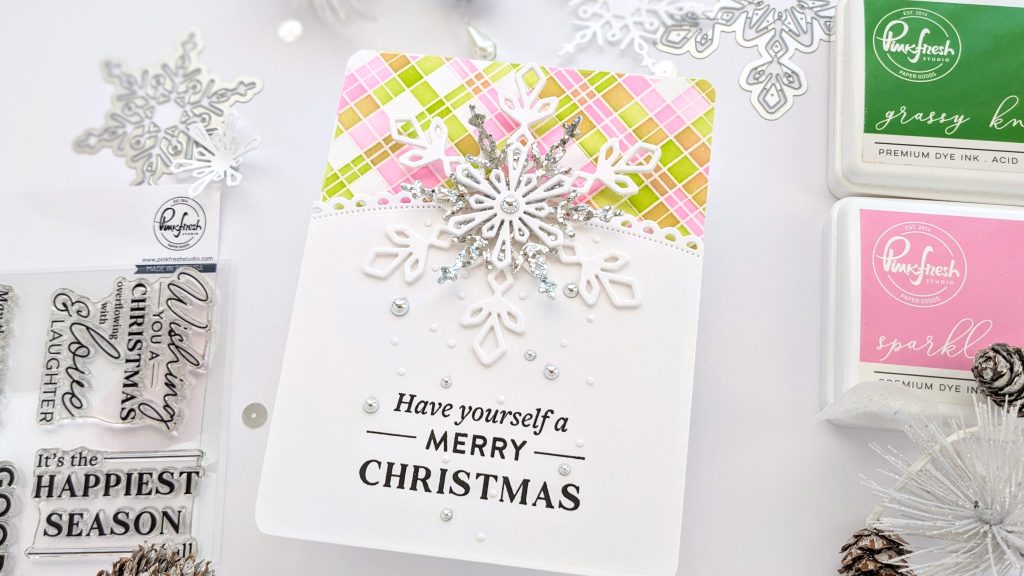
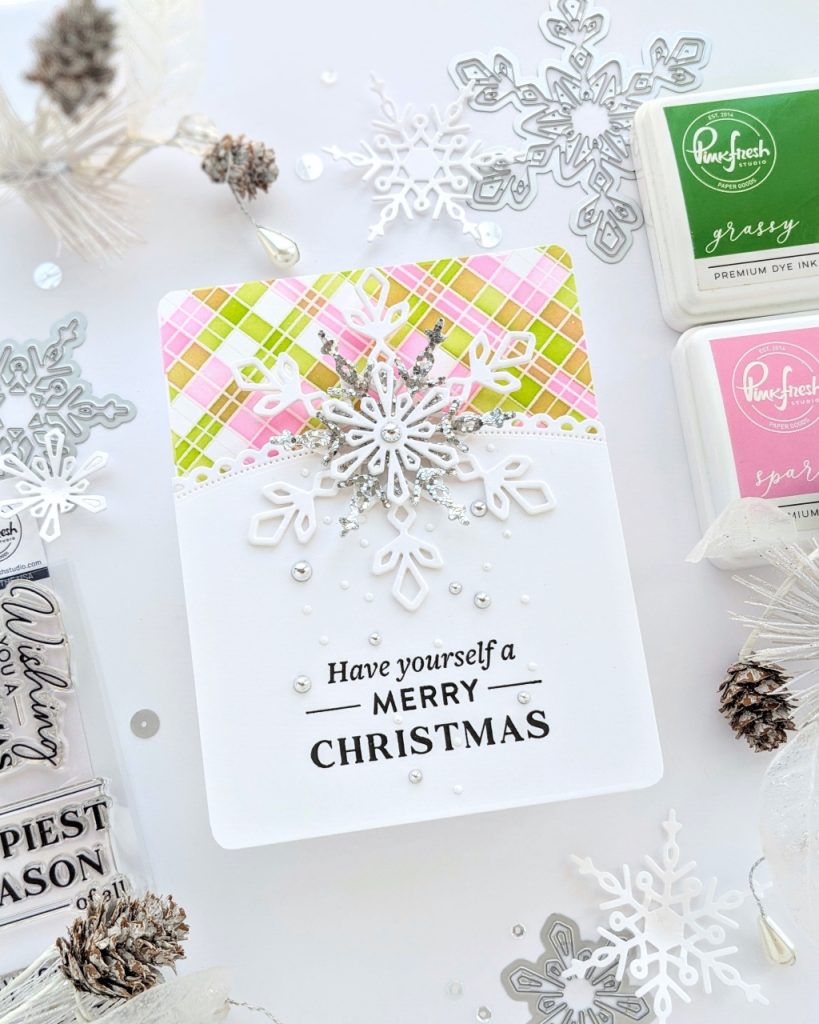
Hi everyone! I’m on the Pinkfresh Studio blog today with a Christmas card! Yay, Christmas! I used the new Large Snowflakes die set and pink and green plaid for a sweet holiday card.
I started with a white cardstock panel (8 1/2 X 5 1/2) and put it into my stamping platform. Then, I used the Dainty Plaid stamp to clear heat emboss lines onto my paper. Next, I used a couple of the stencils from the Dainty Plaid stencil set with Sparkling Rose and Grassy Knoll. I wanted to ensure there would be white in the plaid, so I didn’t cover the whole panel with color.
I love these colors for Christmas, but I can see this card looking so lovely with different color palettes. Maybe the dainty plaid is red, white, grey, and black, with black and white snowflakes? Or perhaps the dainty plaid is a traditional red and green with a shiny gold snowflake. Spend a day making backgrounds, and you’ll have a stack of almost-ready Christmas cards!
When I was done coloring with the stencils, I grabbed a terry cloth towel and gently wiped at the clear embossed lines in case they had ink on them. Then I set it aside and pulled out the Large Snowflakes die set. I used all three dies with more heavyweight white cardstock twice to glue them together so my snowflake would be stronger and more substantial on the card. I also used the medium-sized snowflake die on some super sparkly silver specialty paper and backed that with a white cardstock die cut. I glued the sliver snowflake to the large white snowflake, then used sticky glue dots to adhere the smallest snowflake to the glittery middle one.
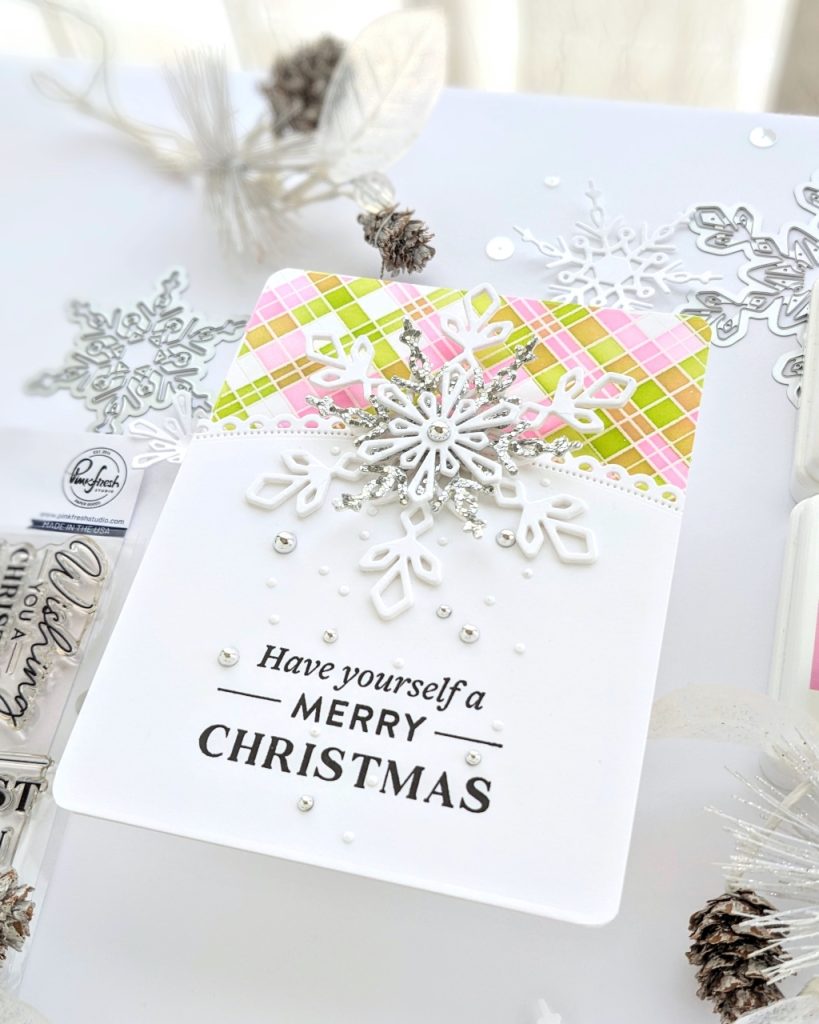
I grabbed an A2 panel of white cardstock and used a die from the Classic Edgers die set at one end of the panel. Then, I placed the lacy panel on the plaid, centered the snowflake in the middle, and moved the white panel down until the snowflake was entirely on the card. I taped it to the plaid panel, then turned the panels over to trim off the excess.
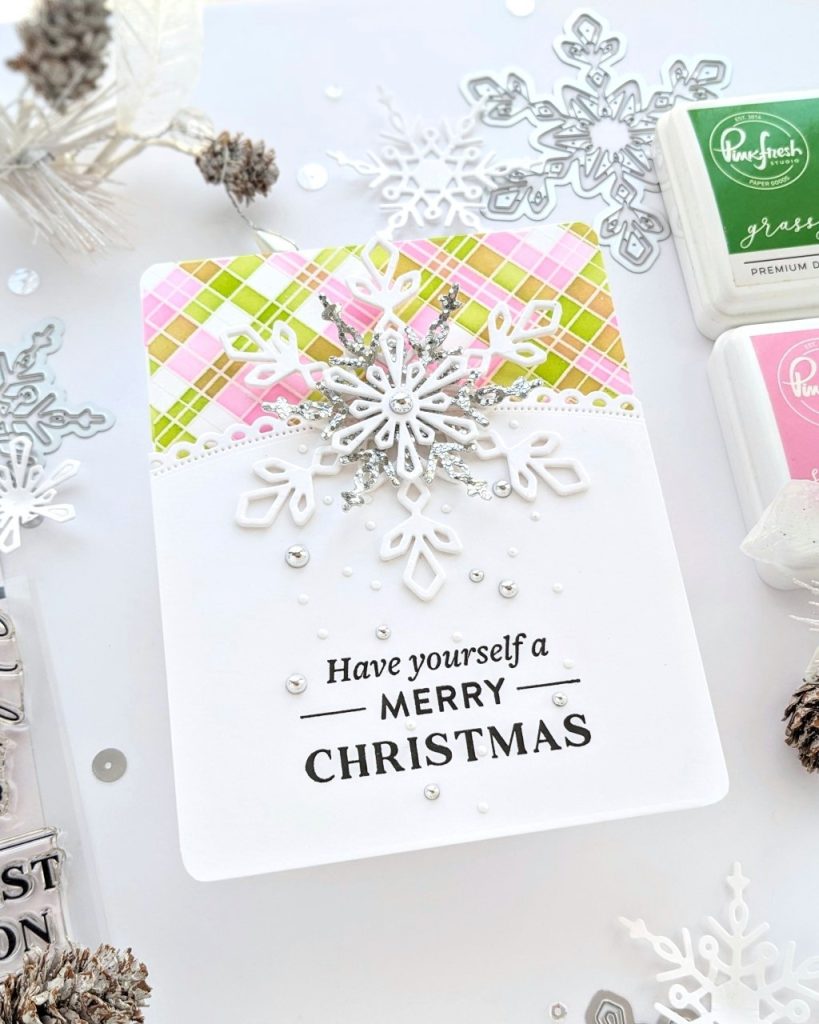
Before gluing down the snowflake, I used Pinkfresh’s new Holiday Large Sentiments to stamp my Christmas greeting with Detail Black. Then, I rounded the corners of everything and started adhering the panels to the cardbase. I used fun foam to pop up the lacy panel. I also used silver metallic pearls and dots from the Hearts and Stars coverplate to mimic a subtle snowfall. And I was done!
I hope some of these design choices have inspired you to make something new today! Thanks so much for stopping by!
-Anne