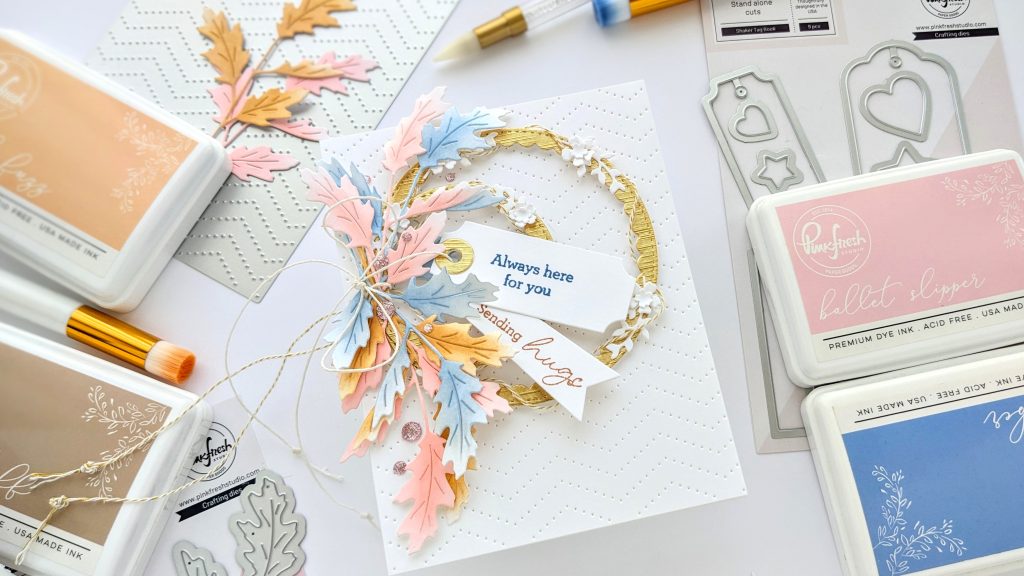
Hi all! I’m on the Pinkfresh Studio blog today with a new card I made with their beautiful new Fall Leaf die. This design has some spikey leaves on a slender stem that will be loads of fun to include on my autumn cards this year. For this project, I went with a soft pink and blue, along with a caramel-y brown for my leaves, and placed them on a dark gold, threaded wreath. I love the bohemian style of this card!
I started by die-cutting out several leaves, using heavyweight white cardstock. Then I used my blending brushes to color them. I used Ballet Slipper and a little Coral Reef… but mostly Ballet Slipper for the pink leaves. I used a light hand with Slumber for the blue leaves, then went over that lightly with Misty Coast. And for the Caramel-y leaves, I brushed on some Warm Buff, trying not to color the tips of the spikey leaves, then went over them with Peach Fuzz and/or Apricot. I just kept changing it up to see what it looked like. I love to use some orange on top of either browns or reds sometimes; it changes the hue slightly by brightening them up. Start with a light hand and give it a minute for the dye ink to sink in before applying more.
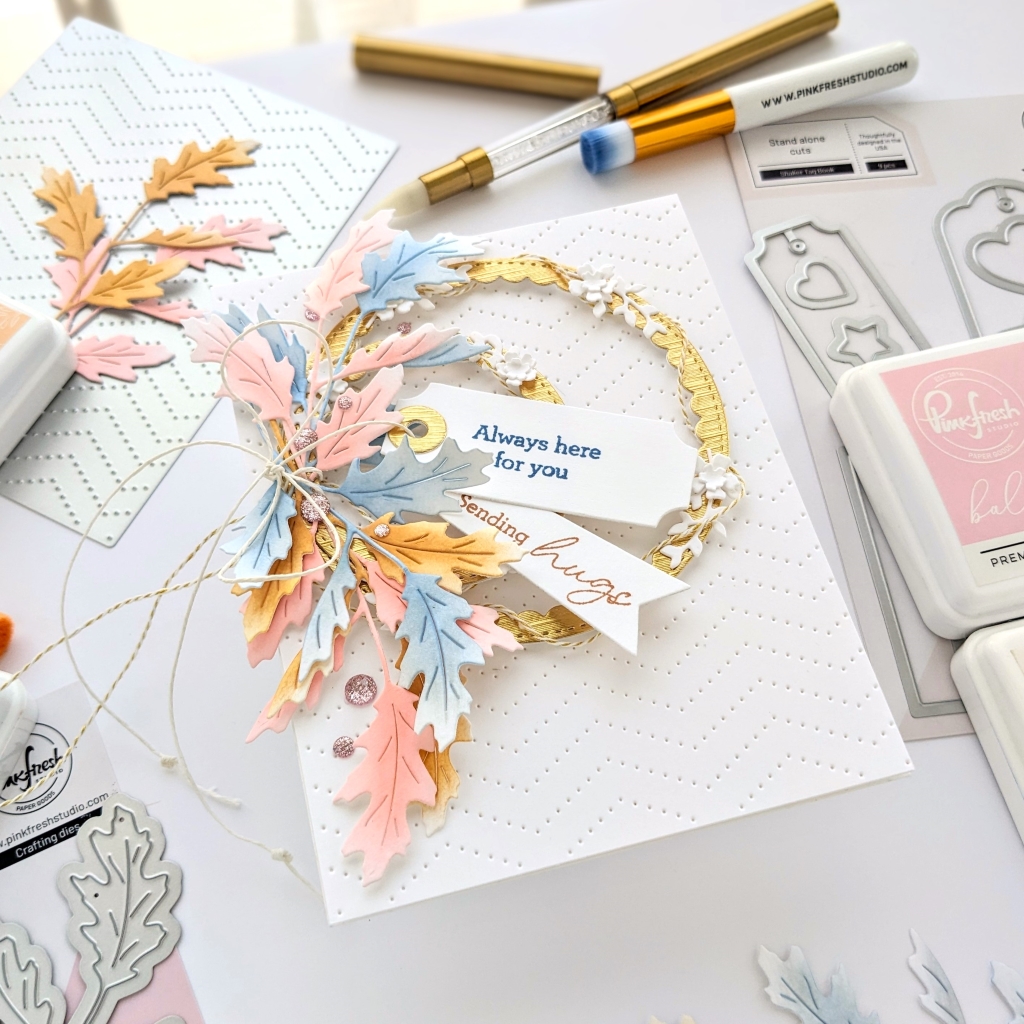
After I had a bunch of leaves colored, I set them aside and pulled out Pinkfresh Studio’s new Dotted Chevron coverplate die. I used it with a panel of white cardstock and glued it to an A2 cardbase. Then I used the Stitched Scallop Circle die set with specialty cardstock for my two wreath circles. I did double those up with additional die-cuts for strength. Then I adhered them down to the cardbase with pieces of foam tape with space between them so I could thread some ivory and gold string around the scallop circles. I also used the Garden Wreath die set for some small floral pieces to place on the wreath, left them white, and bunched them up on the wreath here and there.
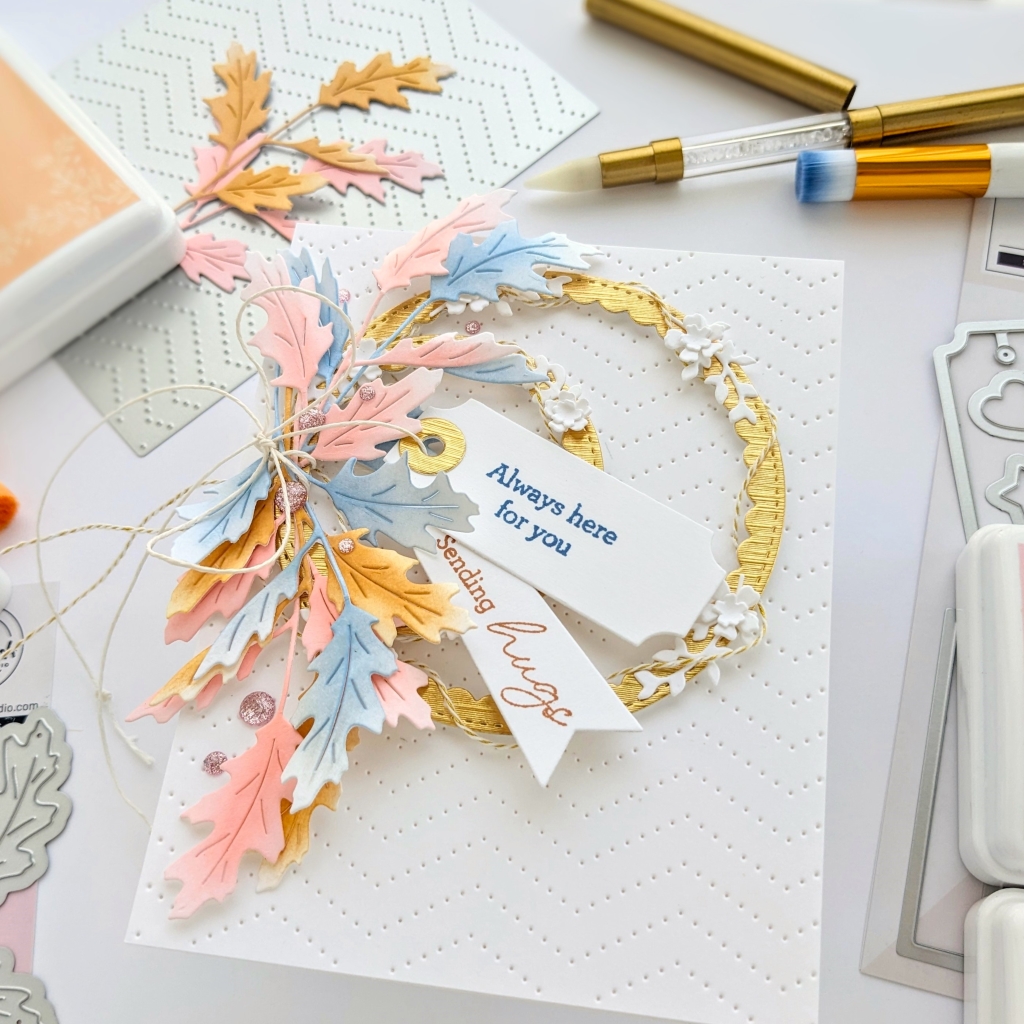
For the Fall Leaf die cuts, I decided to adhere two separate bunches together to place on the wreath. I glued them together on the stems, where they overlapped. Then I arranged them on the card on one side of the wreath. I used another piece of string to attach the sentiments: I used the Wonderful in Every Way stamp set (“Always Here for You) along with the new Shaker Tag Book die set for one of the sentiments and Basic Banners: Everyday stamp (“Sending Hugs”) with the Basic Banners: Celebrate die for the second sentiment. Knotting the ends of the strings at the last minute added a fun detail!

I thought the blush glitter drops were perfect; just scattered around the leaves, and I was done with my card!
I hope some of these design choices have inspired you to make something new today. Thank you so much for stopping by!
-Anne
I can’t get the link to the blog hop to load ? but I saw the card you made in thus blog post, so I wanted to let you know how pretty it is! And thank you for always sharing your creations!❤️❤️❤️
That’s so kind of you, thank you so much for coming by Jennifer! ?