

Hi everyone! I’m on the blog today with a wintery holiday village scene. I used all the ink colors in Pinkfresh’s Amalfi Coast collection for a bluey (real word!) Holiday Street scene. Just a couple of added details lend it a “hand-painted” appearance. Add in a sentiment from the new Holiday Greetings Sentiments stamp set, and I ended up really loving this card. Seeing this design inked up with the Napa Valley colors or the Weeping Willow collection might be cool, too! Now, I’m getting off-topic. Let’s get started with this one first.
I started by white heat embossing the village on a half sheet of white cardstock, 8 1/2 in. X 5 1/2 in. When I tear away the border of the card later, it helps to have a good-sized strip of paper to pull at.
Then, I pulled out the Holiday Street 7-stencil set and the Amalfi Coast collection of inks. I used Waterfall with stencil #1. I used Waterfall again with stencil two, but I made sure to dab off a lot of color from the brush before applying it to keep it lightly colored—it’s the snowy ground. With stencil #3, the trees, I used Turquoise lightly. For stencil #4, I used Turquoise more heavily. Stencil #5 I used Paradise (one of my new favorite colors!). For stencil #6, I used Atlantis, fairly heavy, and with stencil #7, it was Atlantis again; I made sure to dab off a lot of ink from the brush before inking in the sky in sort of light, circular motions to get that mottled, stormy winter sky appearance.
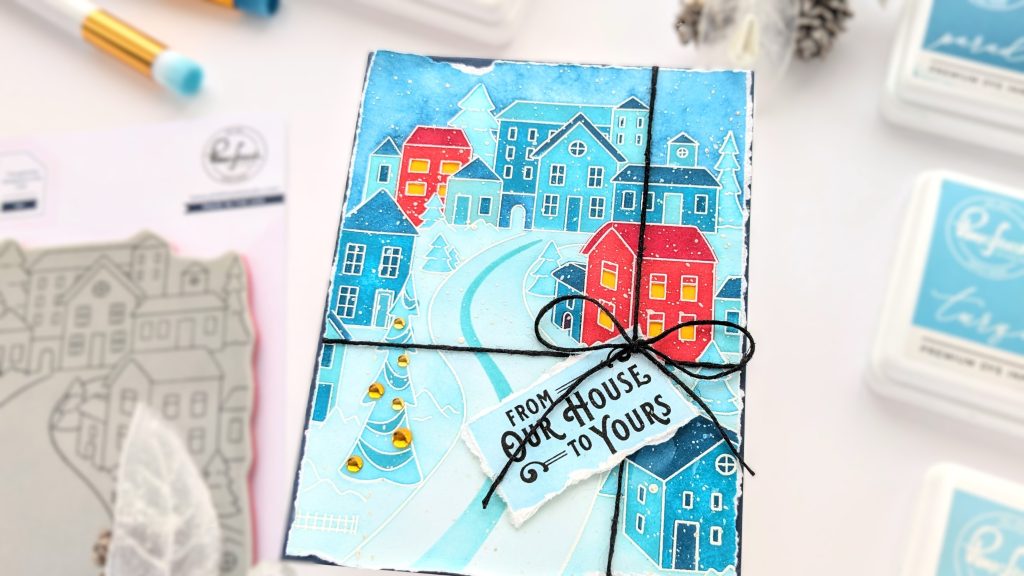
When coloring with my blue inks, I made sure to mask off two houses and used Berrylicious and Candy Apple to color them. I used my craft knife to cut out the windows of the red houses and taped yellow/orange paper behind them. I like that bit of dimensionality it lends.
I watched Heather and Lea Live recently (on the Pinkfresh Studio YouTube channel) when they were sneak-peeking the holiday collection. Heather had a great tip: Color the windows, then use glossy accents over them and let them dry. And the clear, glossy accents will resist the rest of your coloring!
When everything was colored, I splattered it with white gouache for snow. When it was fully dry, I pulled out a metal ruler and held the edge of it where I wanted the border of the card to be. Then, I tore that strip of paper off, pulling it up against the ruler for a straight-line torn look. I roughed the border up a bit more to let more of the dark blue cardbase show.
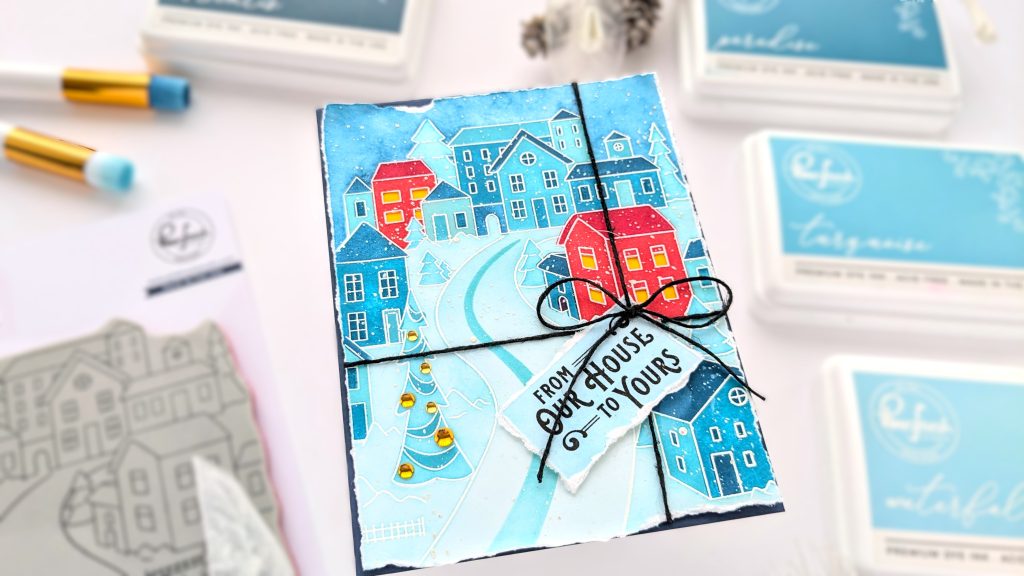
I used Waterfall to color a scrap of cardstock and stamped that just-right sentiment from the new Holiday Greetings Sentiments in Detail Black. I punched a hole in one corner, threaded through some black string, and tied a bow. Then, I put strong double-sided adhesive in the center of the back of the colored panel so that when I stuck it down to the cardbase, the edges and corners would bend up a little. I think it added to the painted look of my card.
Then I added amber-colored clear drops to the tree and was done!
I hope that some of these design choices have inspired you to make something new today! Thanks so much for coming by!
-Anne
Oh, Anne! This is so wonderful! LOve those cut windows and all of the blue – looks like twilight time to me!
=]
Hi Michele! I’m so glad you like it! Thank you! 🩷😊🩷🥳😁🫡