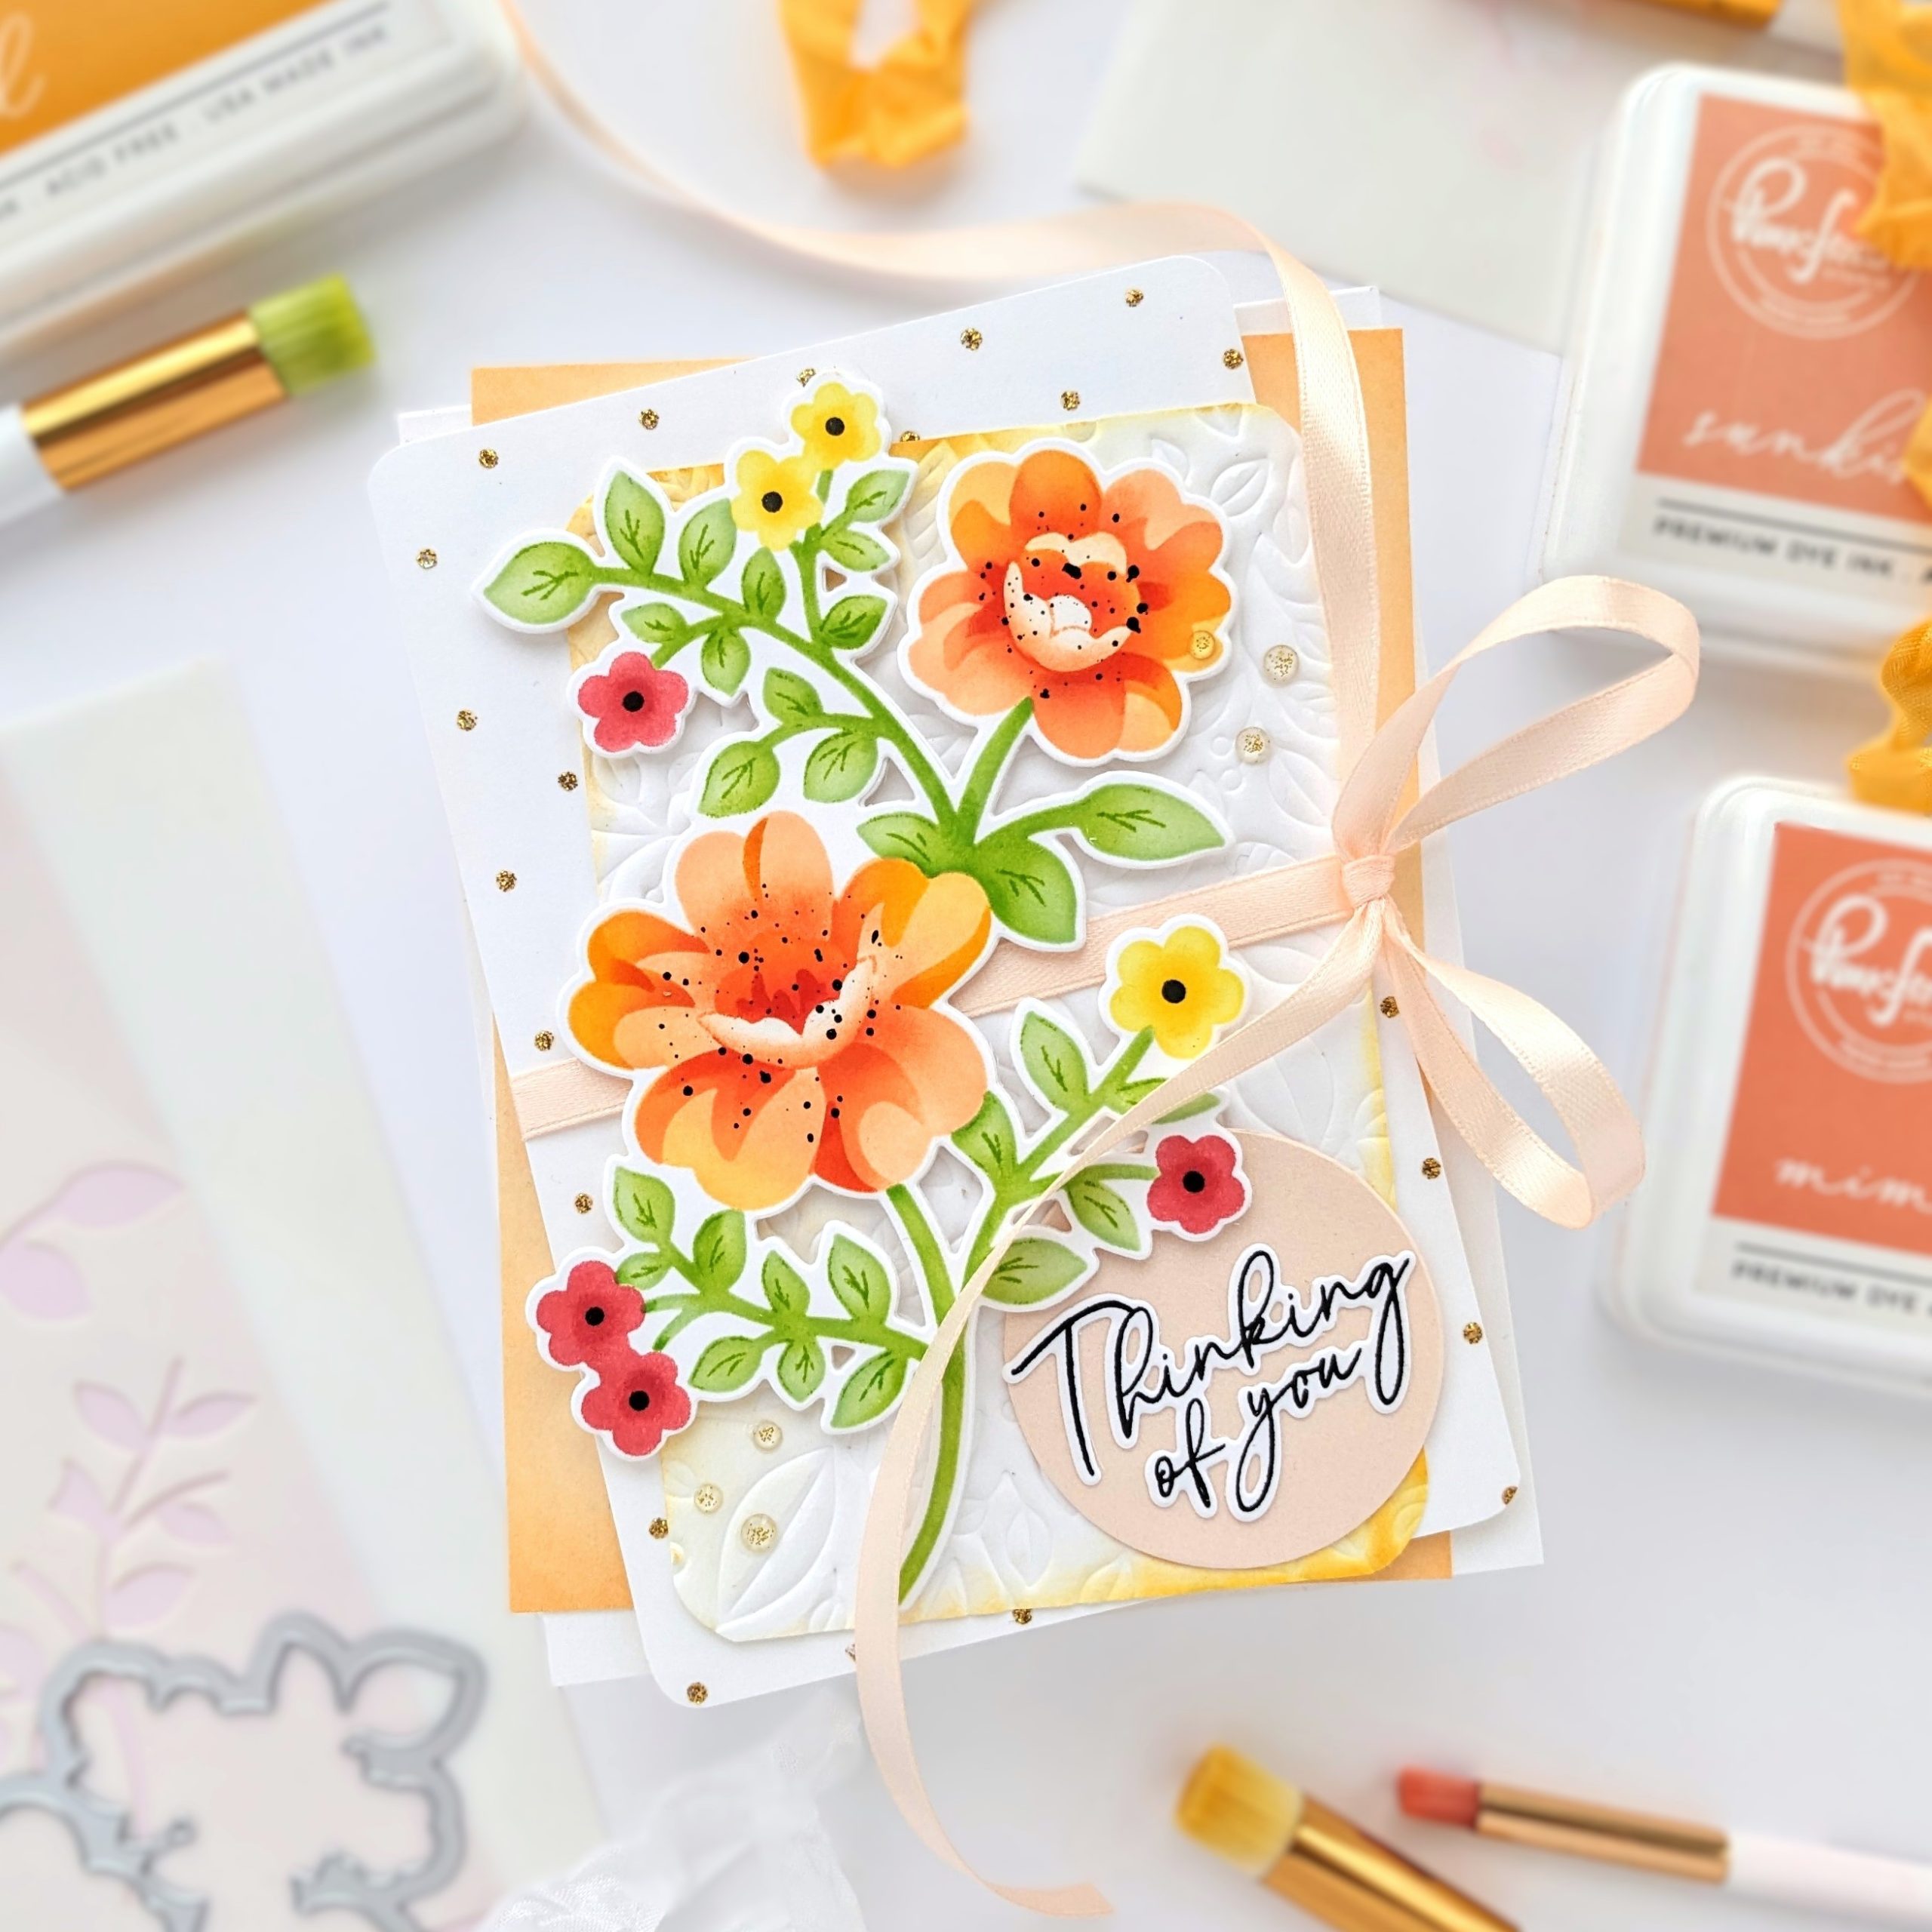

Hi everyone! Today, I’m on the blog with a card with strikingly colored blooms and a background that I changed up at the last minute. I used the whimsical new Never Give Up stamp, stencil, and die sets for this project. Then, I stacked up previously made panels from my stash to back it up.
I started with the background because I wanted to use gold glitter gel with a stencil and knew it would take time to dry. I used a stencil from the Kaleidoscope stencil set with Stickles gold glitter gel on a panel of white cardstock. I waited for the first application to dry, then shifted the stencil and used it again to get the pretty polka-dot pattern I was looking for. So, while waiting for that to be completely dry, I started on the flowers.
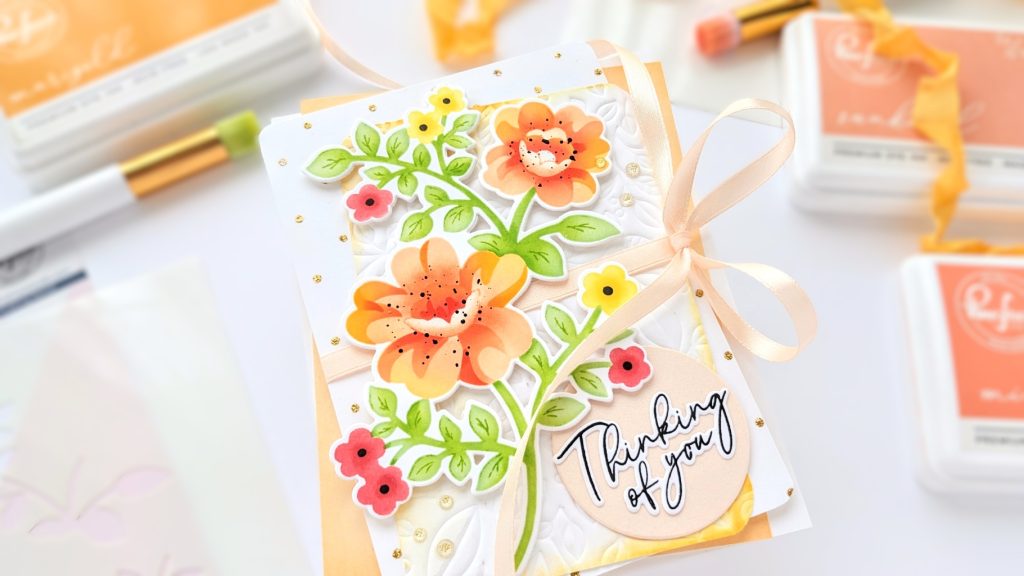
I began with an 8 1/2 X 5 1/2-inch piece of cardstock in a stamping platform. I wasn’t entirely sure what I wanted to do with my flowers after I colored them in, so I used the stamp, a very light green ink, and a finger dauber to ink up the stems and leaves. This process placed a partial image on the paper so that I could line up the stencil and later stamp over it if I wanted to. After using the stencil set to color, I decided I loved it as it was and not to stamp over it.
When coloring the flowers, I used Sunkissed, Mimosa, Mango Sorbet, and Fruit Punch. I also used a couple of oranges from the Indian Summer collection, such as Peach Fuzz and Apricot. Then I reached for some yellow inks, Sweet Mustard and Marigold, and brushed darker yellows into the blend. I went back and forth with the stencils with just a few thoughts in mind: start with a light hand, layer the ink colors (for richness and interest), and try to keep the bloom’s center darker than the tips of the petals.
I really loved the intenseness of the Marigold ink brushed into the mix of oranges. And the bold orangey-red of the Fruit Punch!
When I was done coloring, I cut a couple of circles from scrap paper, placed the open spaces over the center of the flowers, and masked off the rest of the image with copy paper to splatter black onto just the middle of the blooms. When it was dry, I used the Never Give Up die to cut it out.
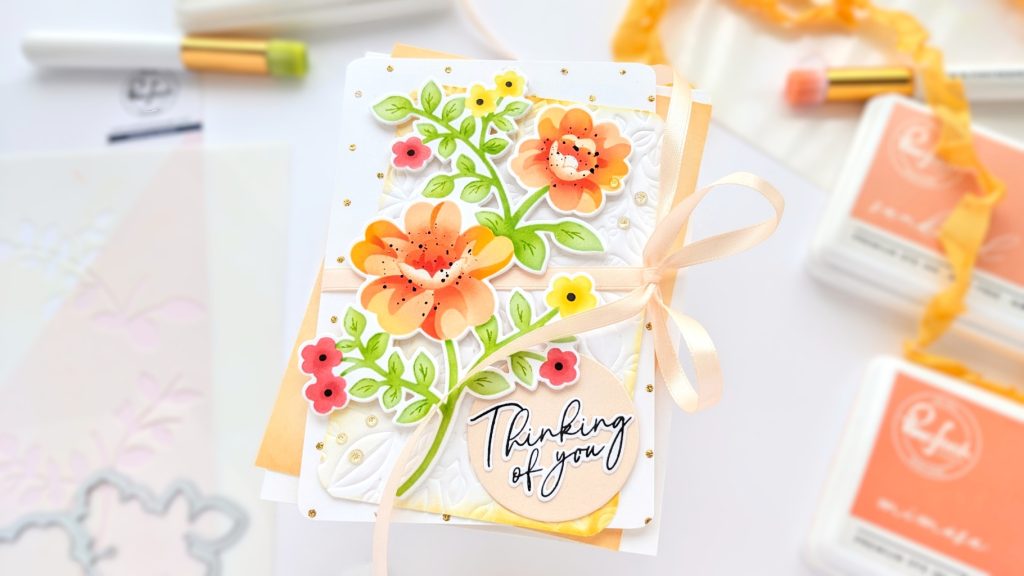
I didn’t love it when I placed it over the gold polka dot background I had made. It was okay, but I wanted to keep trying. I dug through my stash drawer, full of rejected panels and elements from previous makes, and found a few pieces to layer with the polka-dot panel.
I tied a peach satin ribbon around everything and used a sentiment from the Amazing Things stamp and die sets.
I hope some of these design choices have inspired you to make something new today! Thanks so much for stopping by!
-Anne