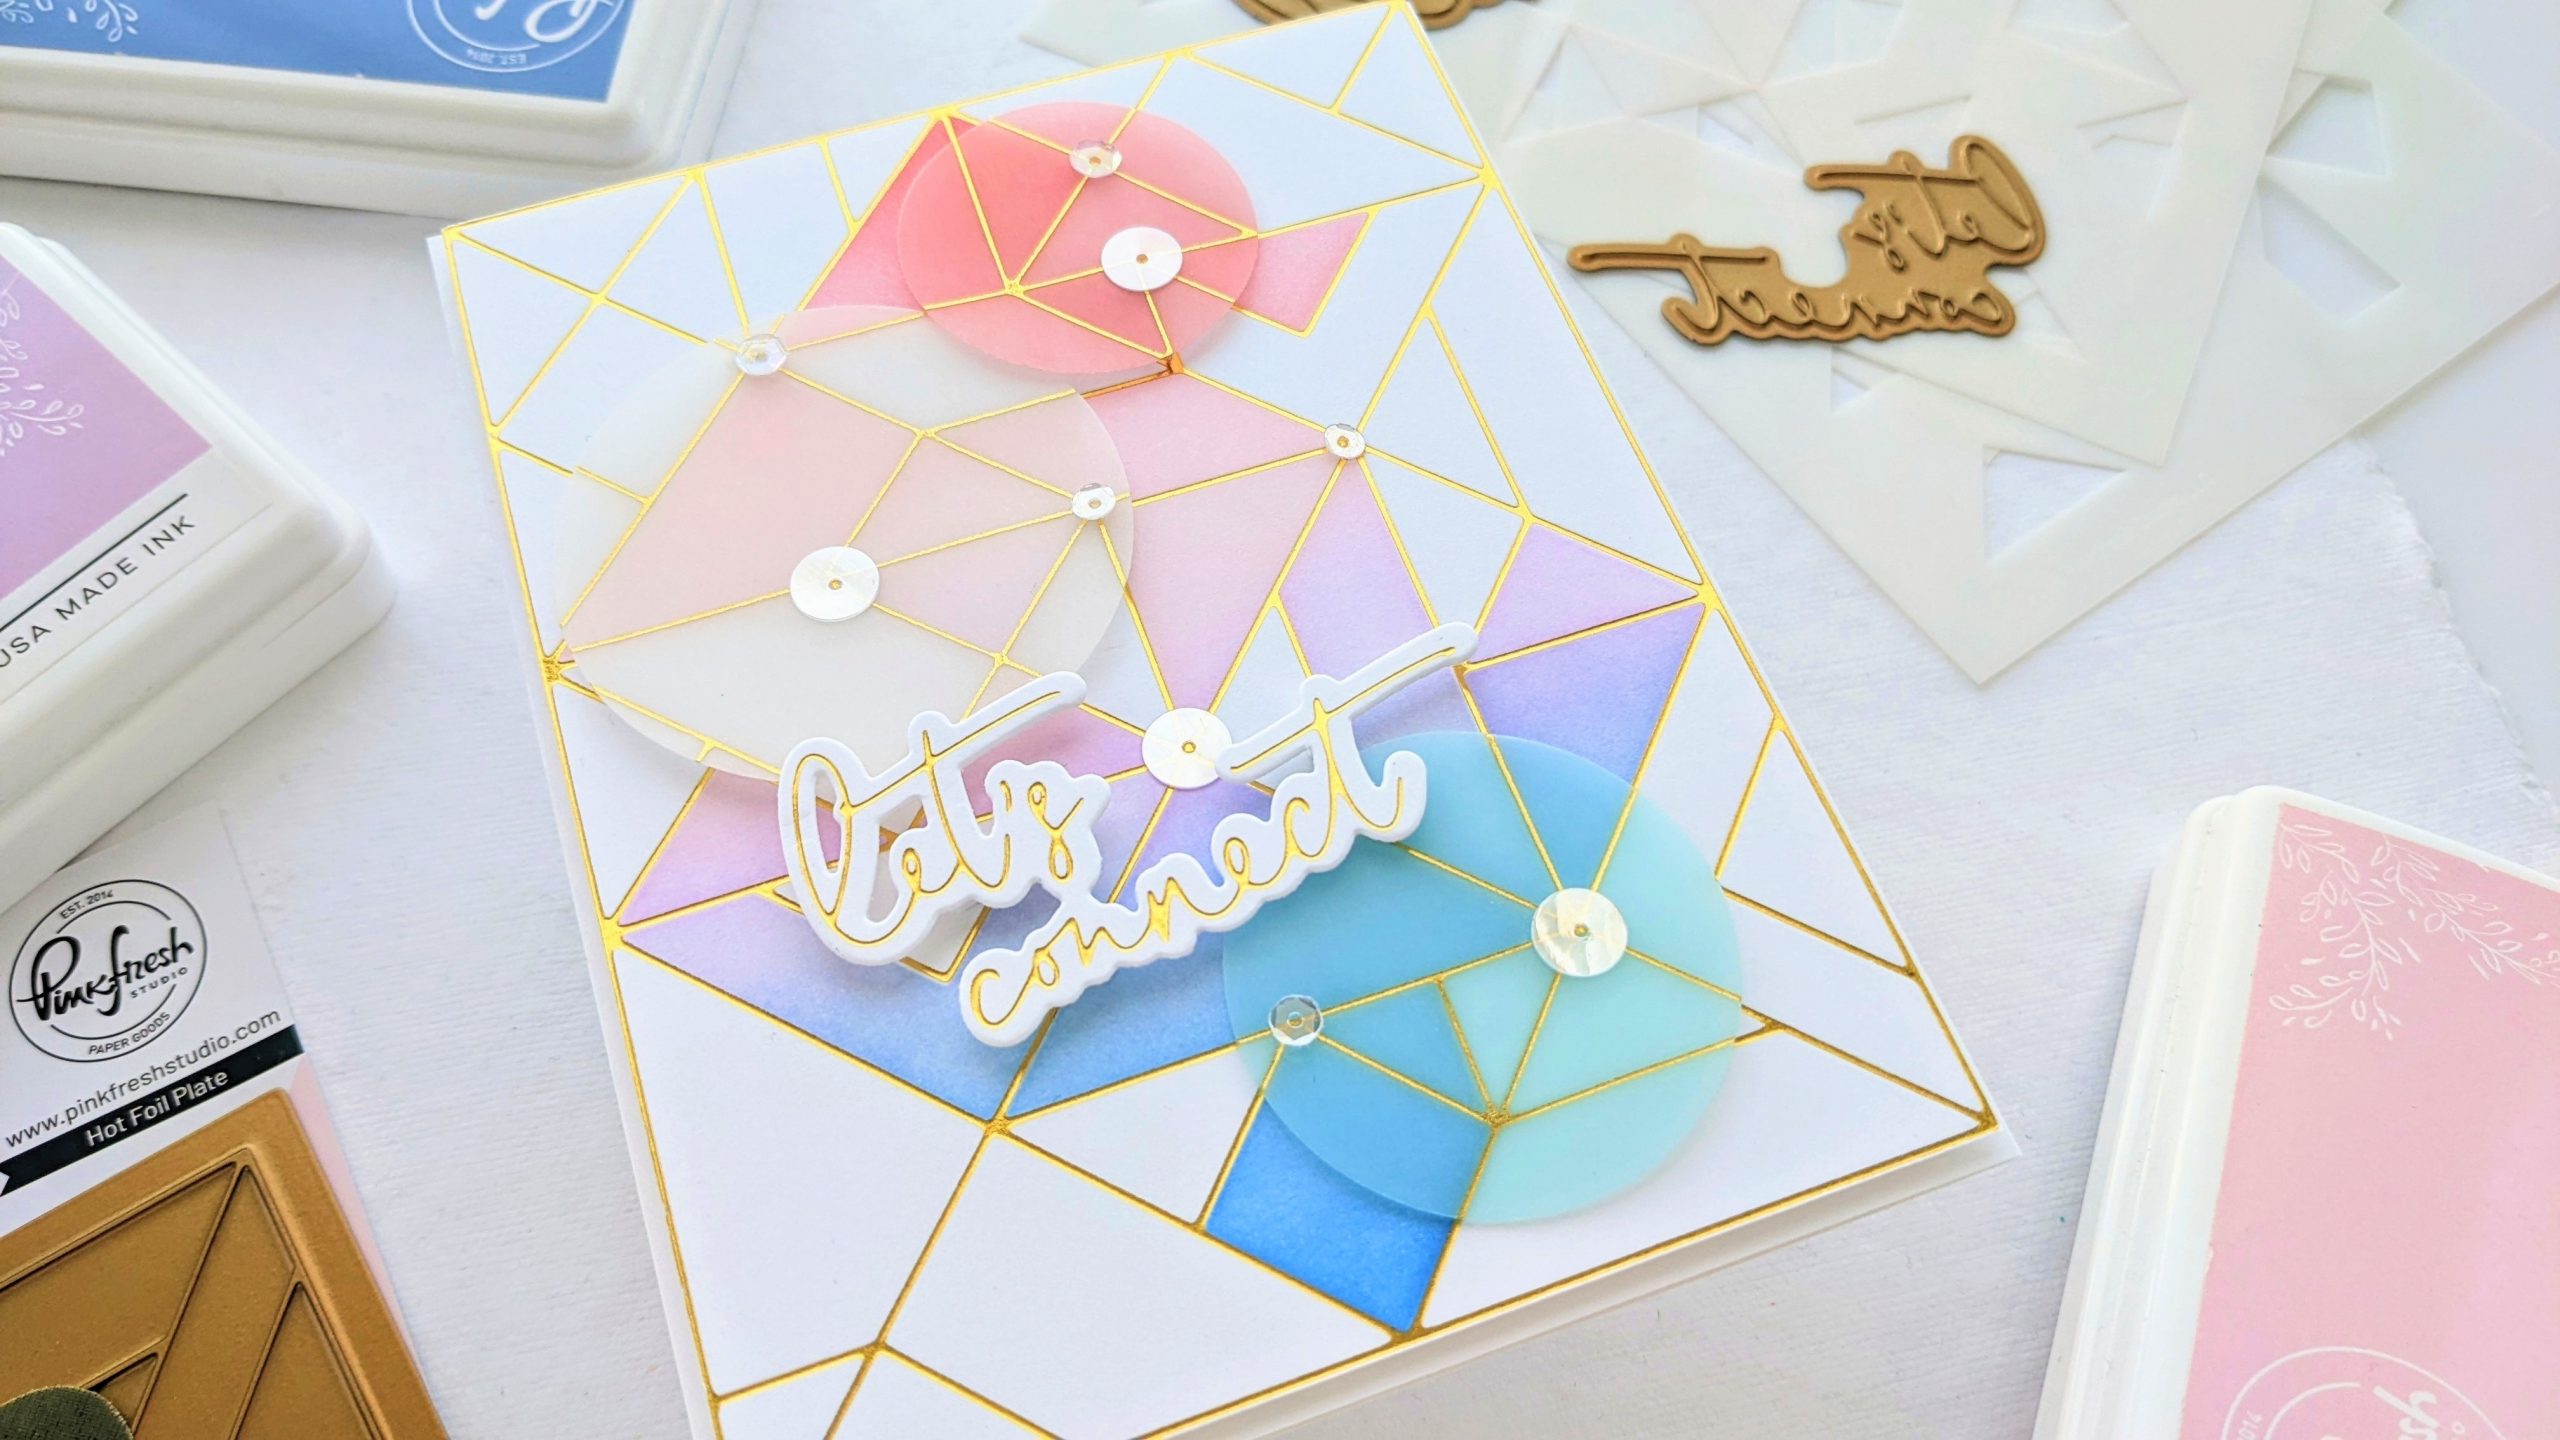
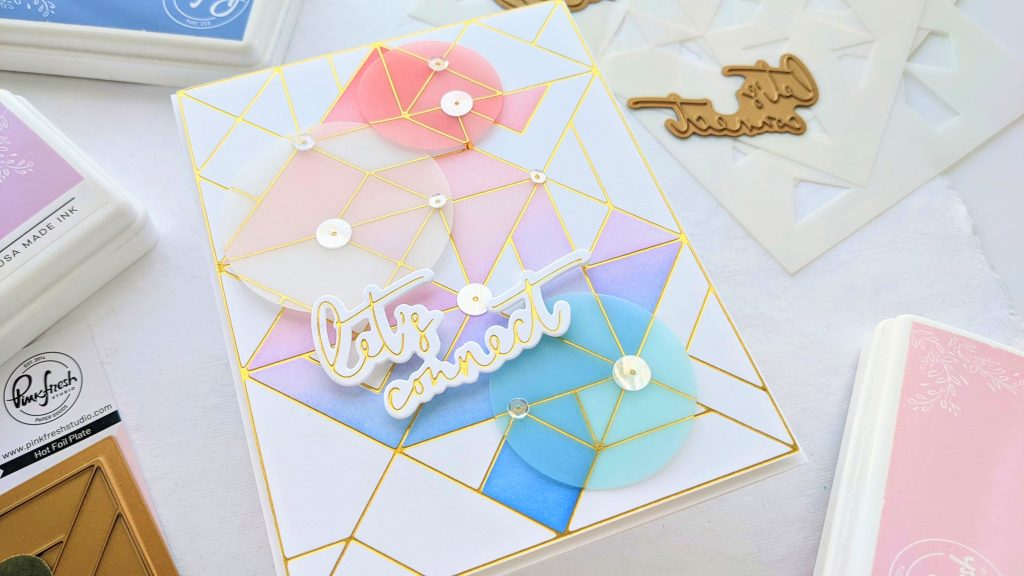
Hello and welcome back to my blog! I’m up on the Pinkfresh Studio blog today with a card that’s a bit of a departure for me, no flowers or frills! Gasp! I had a lot of fun doing something a little new for me and used Pinkfresh’s new Art Deco layering stencil and hot foil plate, some masking, Pinkfresh inks and vellum circles for a soft graphic card that can be sent to anyone.
I started by using the Art Deco hot foil plate on Neenah solar white, 110 lb. And while I had my Glimmer machine out, I foiled several pieces of colored vellum, ( pick up my colored vellum on Amazon) because I wasn’t entirely sure of the specific color scheme I wanted to use yet. I wanted to lay them all out and look at them, to see which ones appealed to me most. I ended up using the foiled clear vellum and the pastel red and blue vellum sheets.
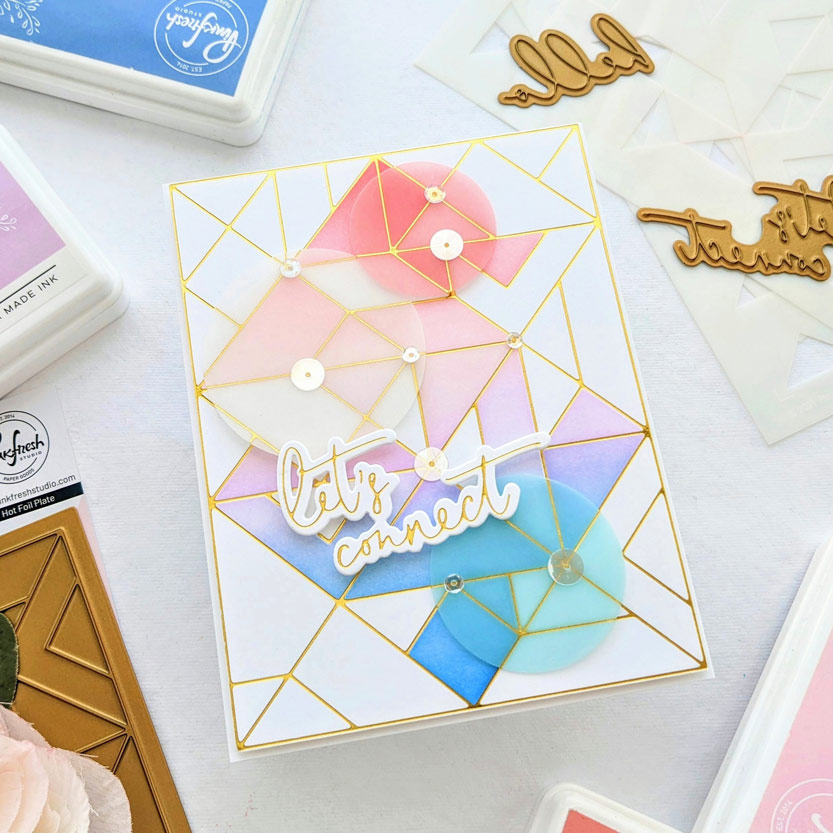
Then I started masking out the corners of the foiled piece of cardstock, using 3M Post-it tape, and blended Pinkfresh inks: Passion Fruit, Coral Reef, Ballet Slipper, Soft Lilac, Lavender, Slumber and just a little bit of Blue Jay, from one end of the card to the other. I only used stencils 1 & 2 of the 3-stencil set because I liked having some white tiles inside the inked image.
I grabbed some circle dies from various Pinkfresh die sets (I think I used dies from the Mini Slimline Essential Bundle and the Folk Edge Circles to get the sizes that I wanted.) I placed the foiled vellum sheet over my ink blended image to arrange the circle dies just where I wanted them and used washi tape to hold them in place while I die cut them out.
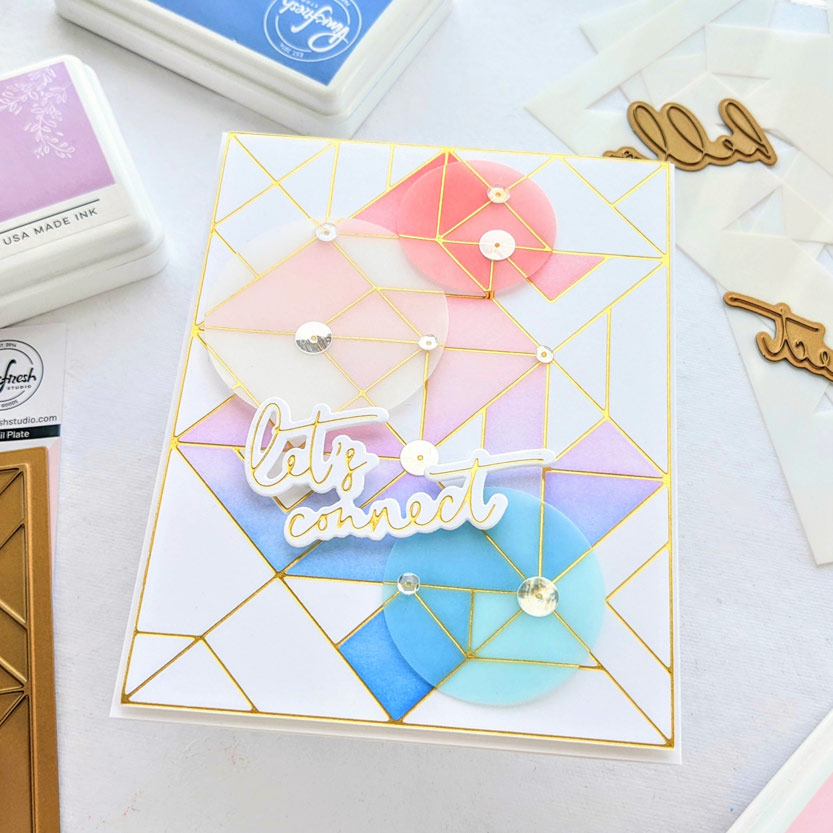
Once those circles where cut out I used tiny bits of foam tape to pop them up from the card base and placed large sequins over the barely visible foam tape. The thicker the vellum is the harder it is to see the adhesive used and the colored vellum was pretty thin. I used the Fancy Script Words hot foil plate and die set, with more of the same gold foil to add a pun-y sentiment and was done!
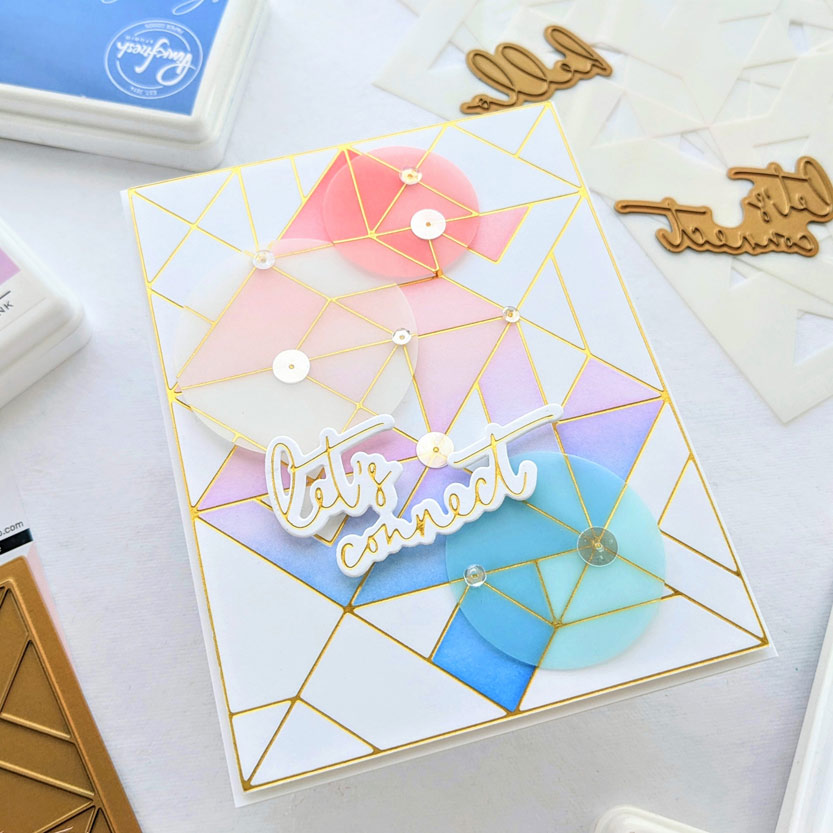
(pssst! I attached the foiled base piece upside down on the card base, so the hinge is on the right! I’m not sure if I want to fix it or not as this is making me laugh! I guess it depends on who you send it to.)
I hope some of these design choices have inspired you to make something new today! Thank you so much for coming by!
-Anne

Your card is amazing!
Could you please share the brand and weight of the vellum?
Just not sure which brands can be foiled!
Hi Debbie! The regular (white) vellum I use is Bazzill’s 40lb. And you can get it a couple of places: Amazon & Simon Says Stamp. Scrapbook.com has a lighter weight 12×12 version. The colored vellum I used did not say what the weight was, but I can tell by handling it that it is a lighter weight than my reg. white vellum. And everything foiled just fine using the Thin Shim and Spacer Pad that came with my Glimmer machine. Here is a link to the colored vellum that I used: https://www.amazon.com/gp/product/B082CVYBVR/ref=ppx_yo_dt_b_asin_title_o03_s00?ie=UTF8&psc=1.
I do have some difficulty foiling acetate, but that’s a whole other story! (I had to use my heat gun on the foiled acetate, just to warm it up again, then quick run it through my die cutting machine, and then leave it under a stack of books over night to flatten it) …Sorry!! I really ran on. I hope this helps, thank you so much for coming by!
Thanks so much for the reply Anne!